I did a post recently about the hydroponic flood table I set up for my lettuce.

Now I have set up a Dutch Bucket system for my broccoli, cabbage, tomatoes, cucumbers and squash. This system is not replacing my garden but complimenting it by extending my gardening season, hopefully, both in the spring and fall.

I have really enjoyed watching the youtube video by mhpgardener, Dutch Bucket Hydroponics-How it works and How to Make Your Own Buckets and Hydroponic Update-Dutch Butch Tomatoes & Kratky Lettuce. This system is a little more involved than the flood table but still very simple, cost effective and easy to set up. You can watch the above videos but I will also show you how I set my system up, the supplies that are needed and the cost. You can even set this up in a basement if you use grow lights. The neat thing is it does not take much space.
I chose this system for my “longer season” and “heavier” crops. I am experimenting with several crops the video doesn’t show (broccoli and squash). I found another video showing cucumbers. The challenge with cucumbers will be pollination so we will see how that goes. I have been told by an experienced greenhouse grower that tomatoes do not need bees to pollinate the blossoms. They just need wind to vibrate the blossoms. I will probably use a small fan to make my breeze when they start to bloom. The other thing I am very anxious to see is whether the squash bore will bother plants in a hydroponic setup. Since they will be planted in perlite instead of soil maybe, just maybe, the bore will not be able to bother the plant. Time will tell on that one. Stay tuned!!!
I have been collecting my components and today I set up my system. It took me all day. I am one tired puppy tonight but very pleased.
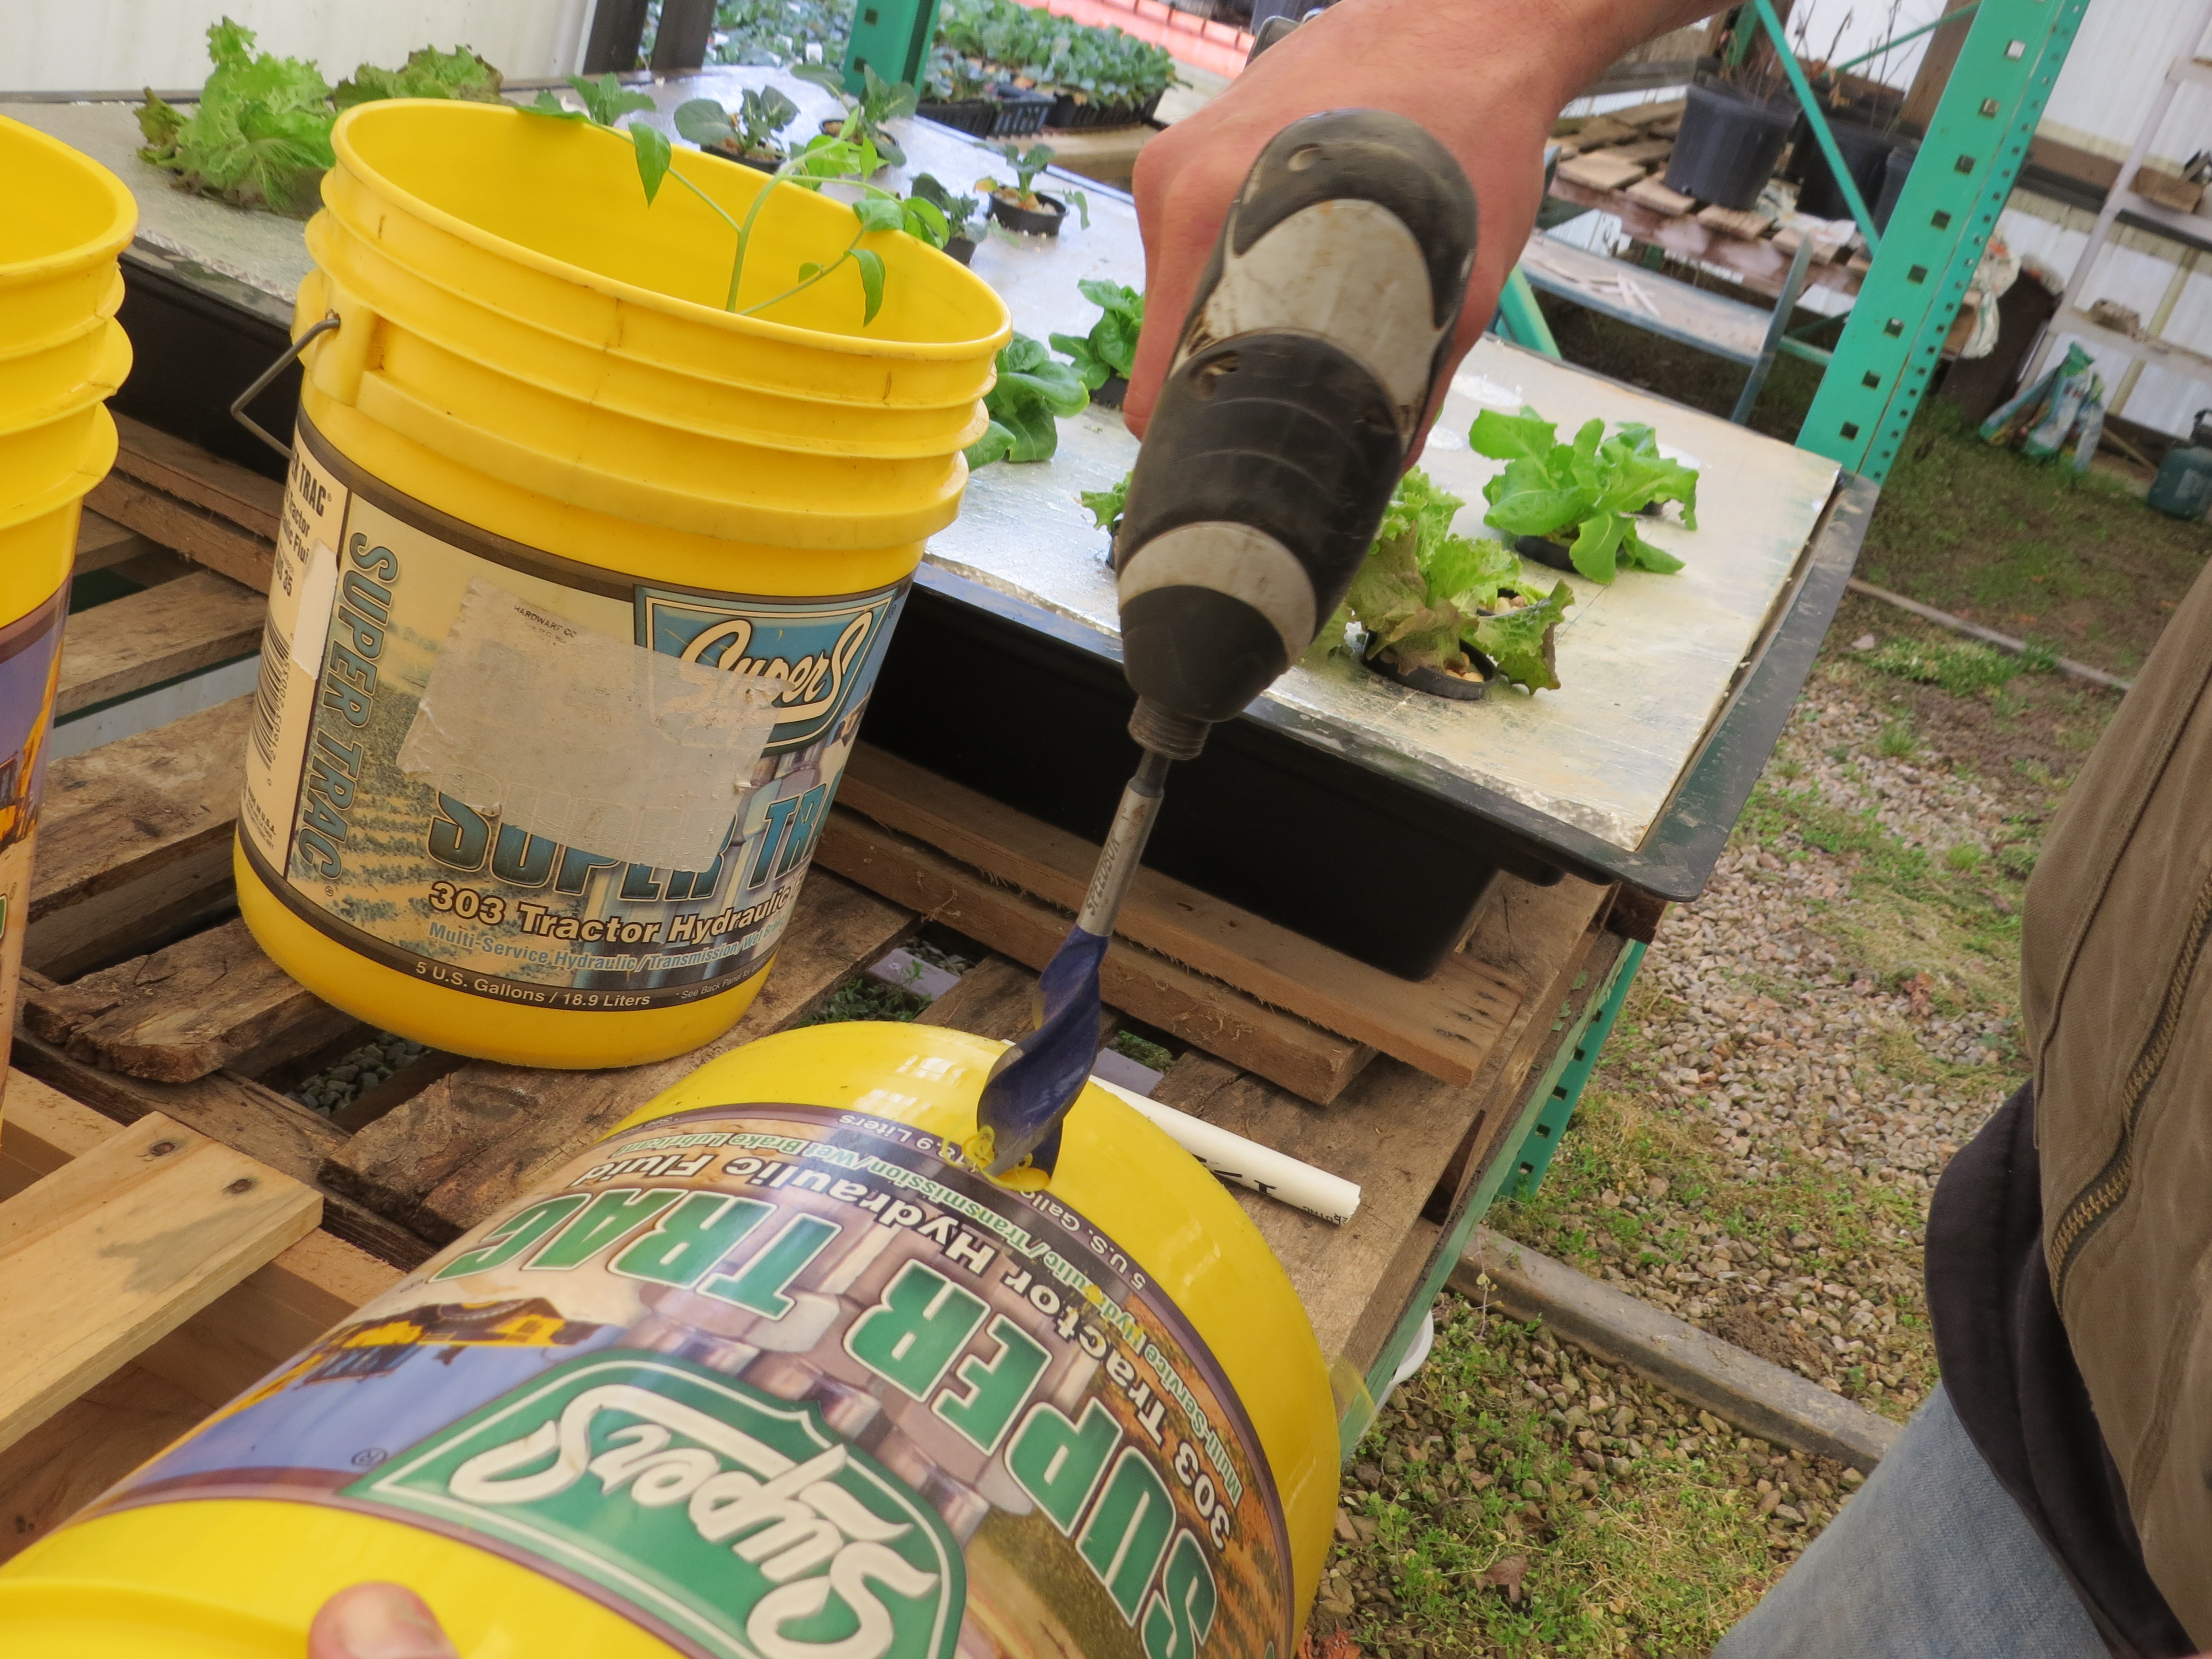
Drilled 1″ hole in my bucket2-3″ from bottom.
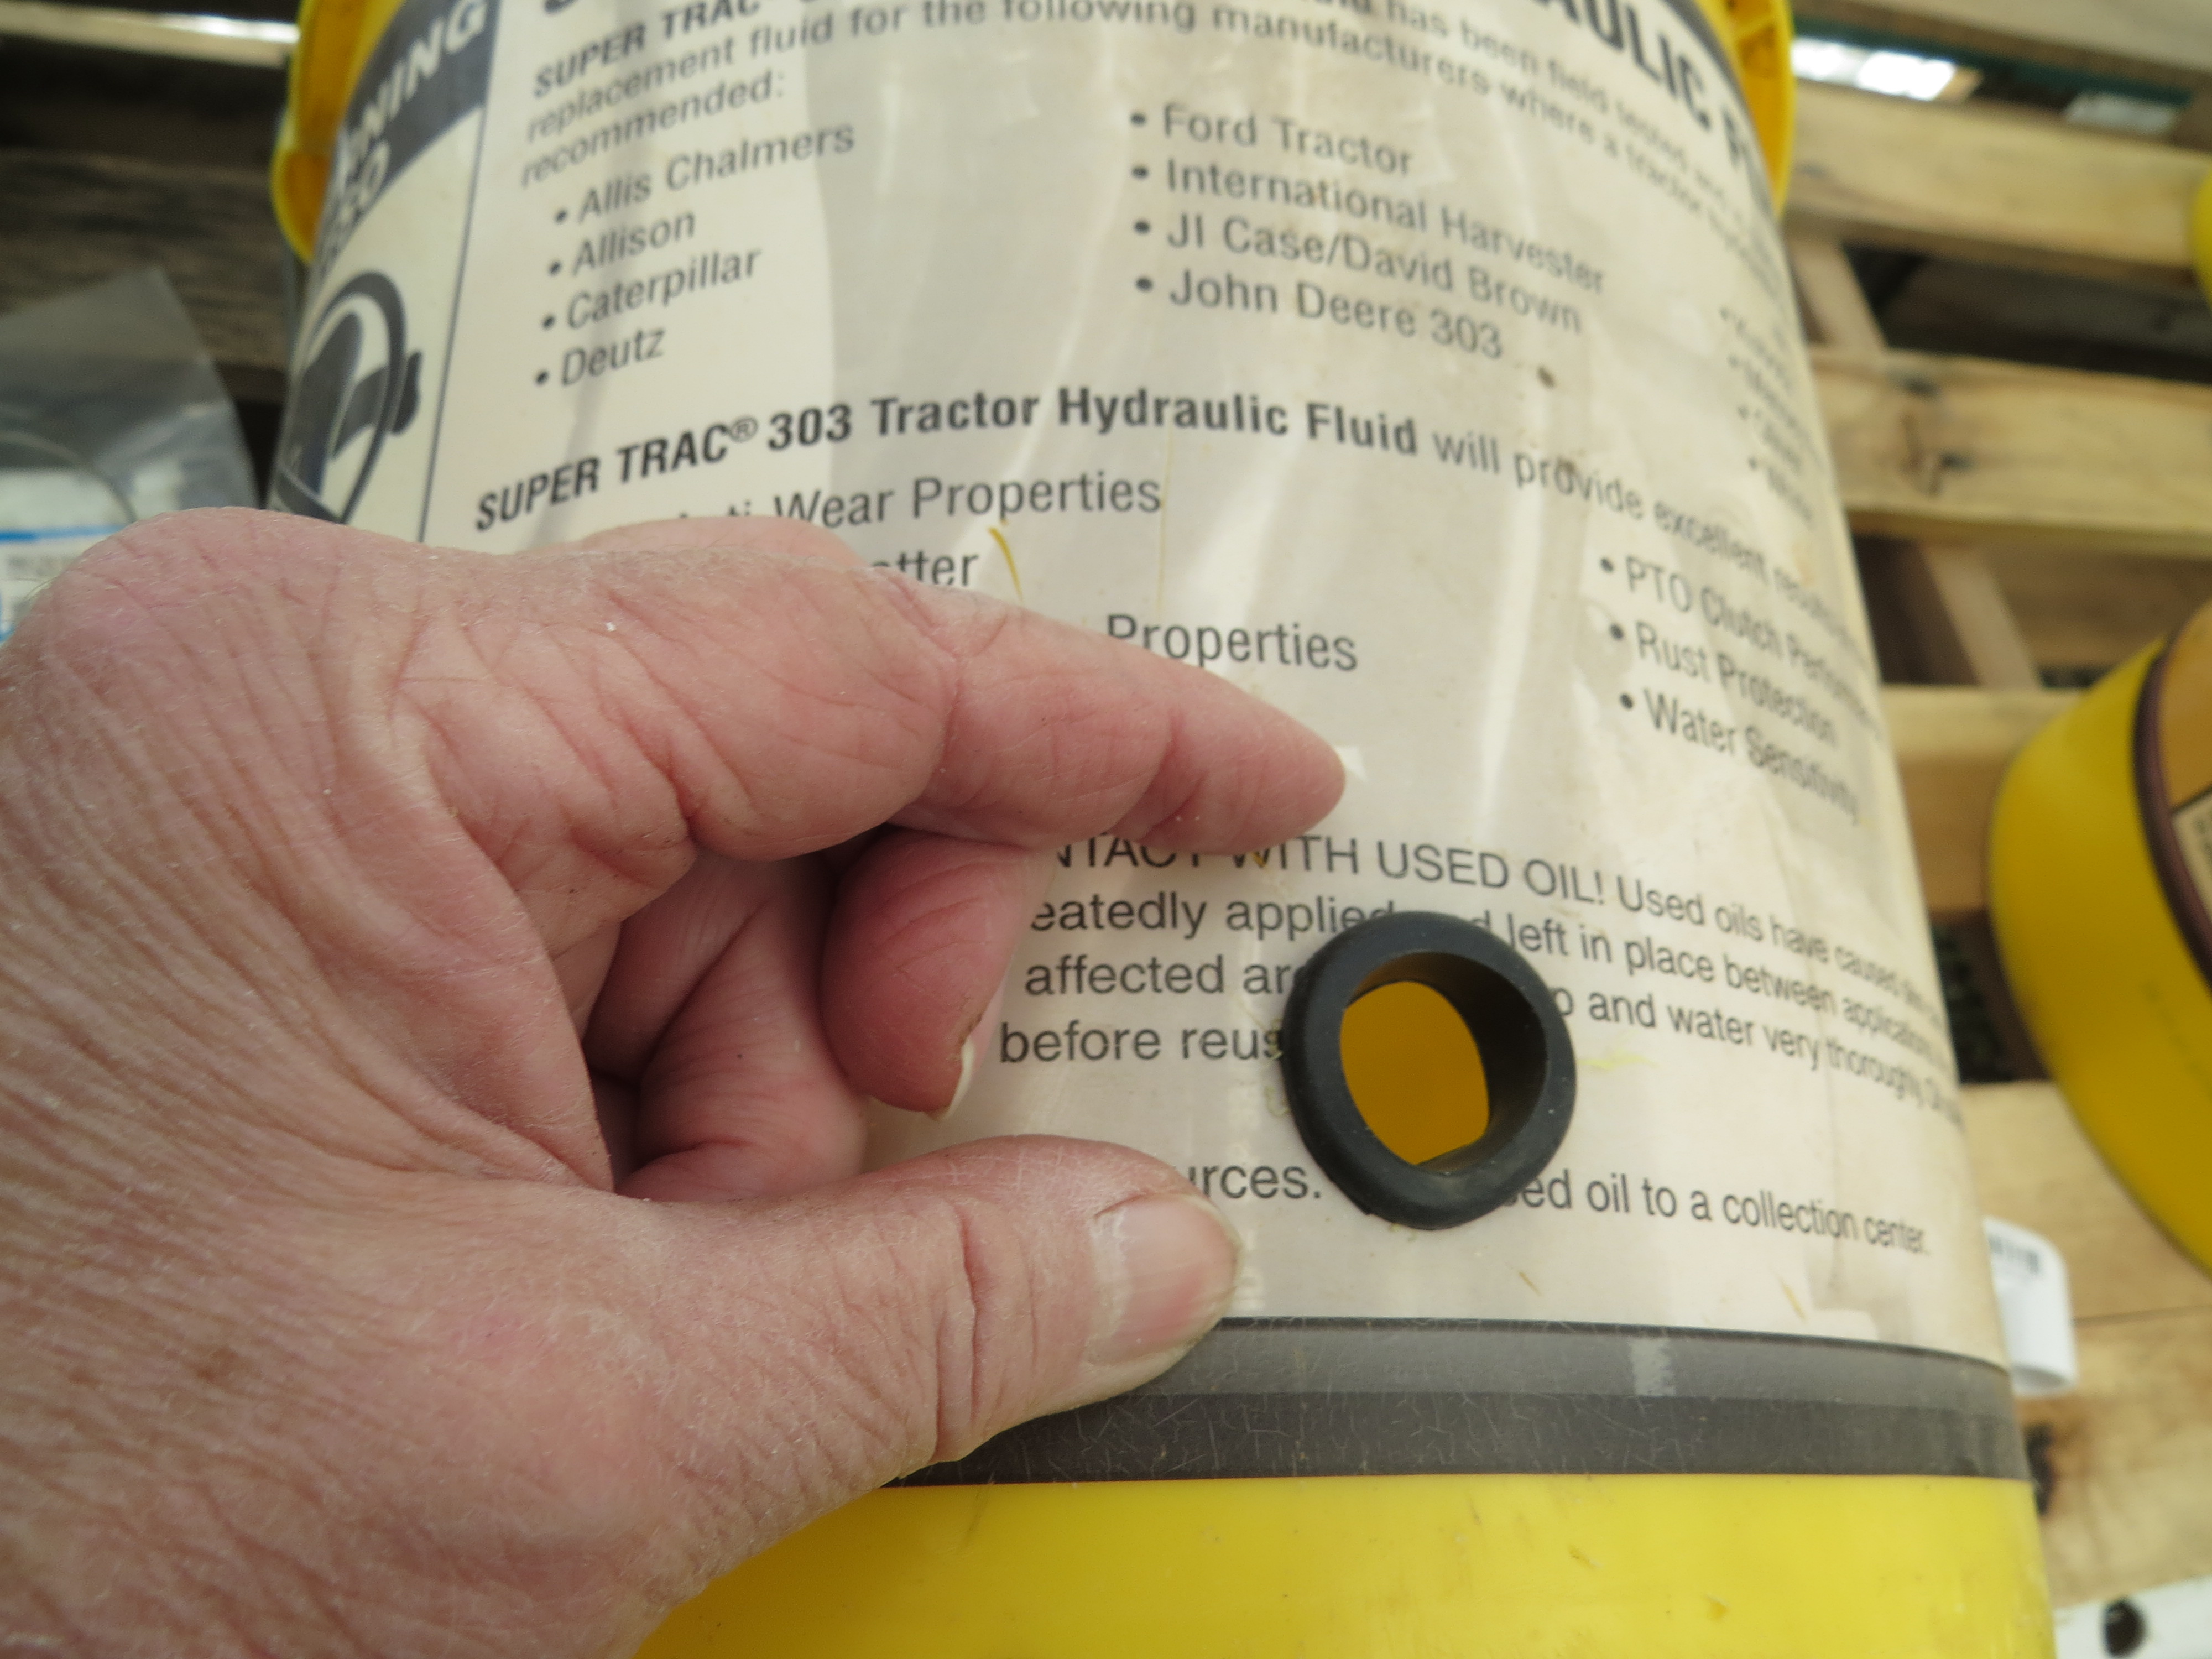
Insert the rubber grommet.
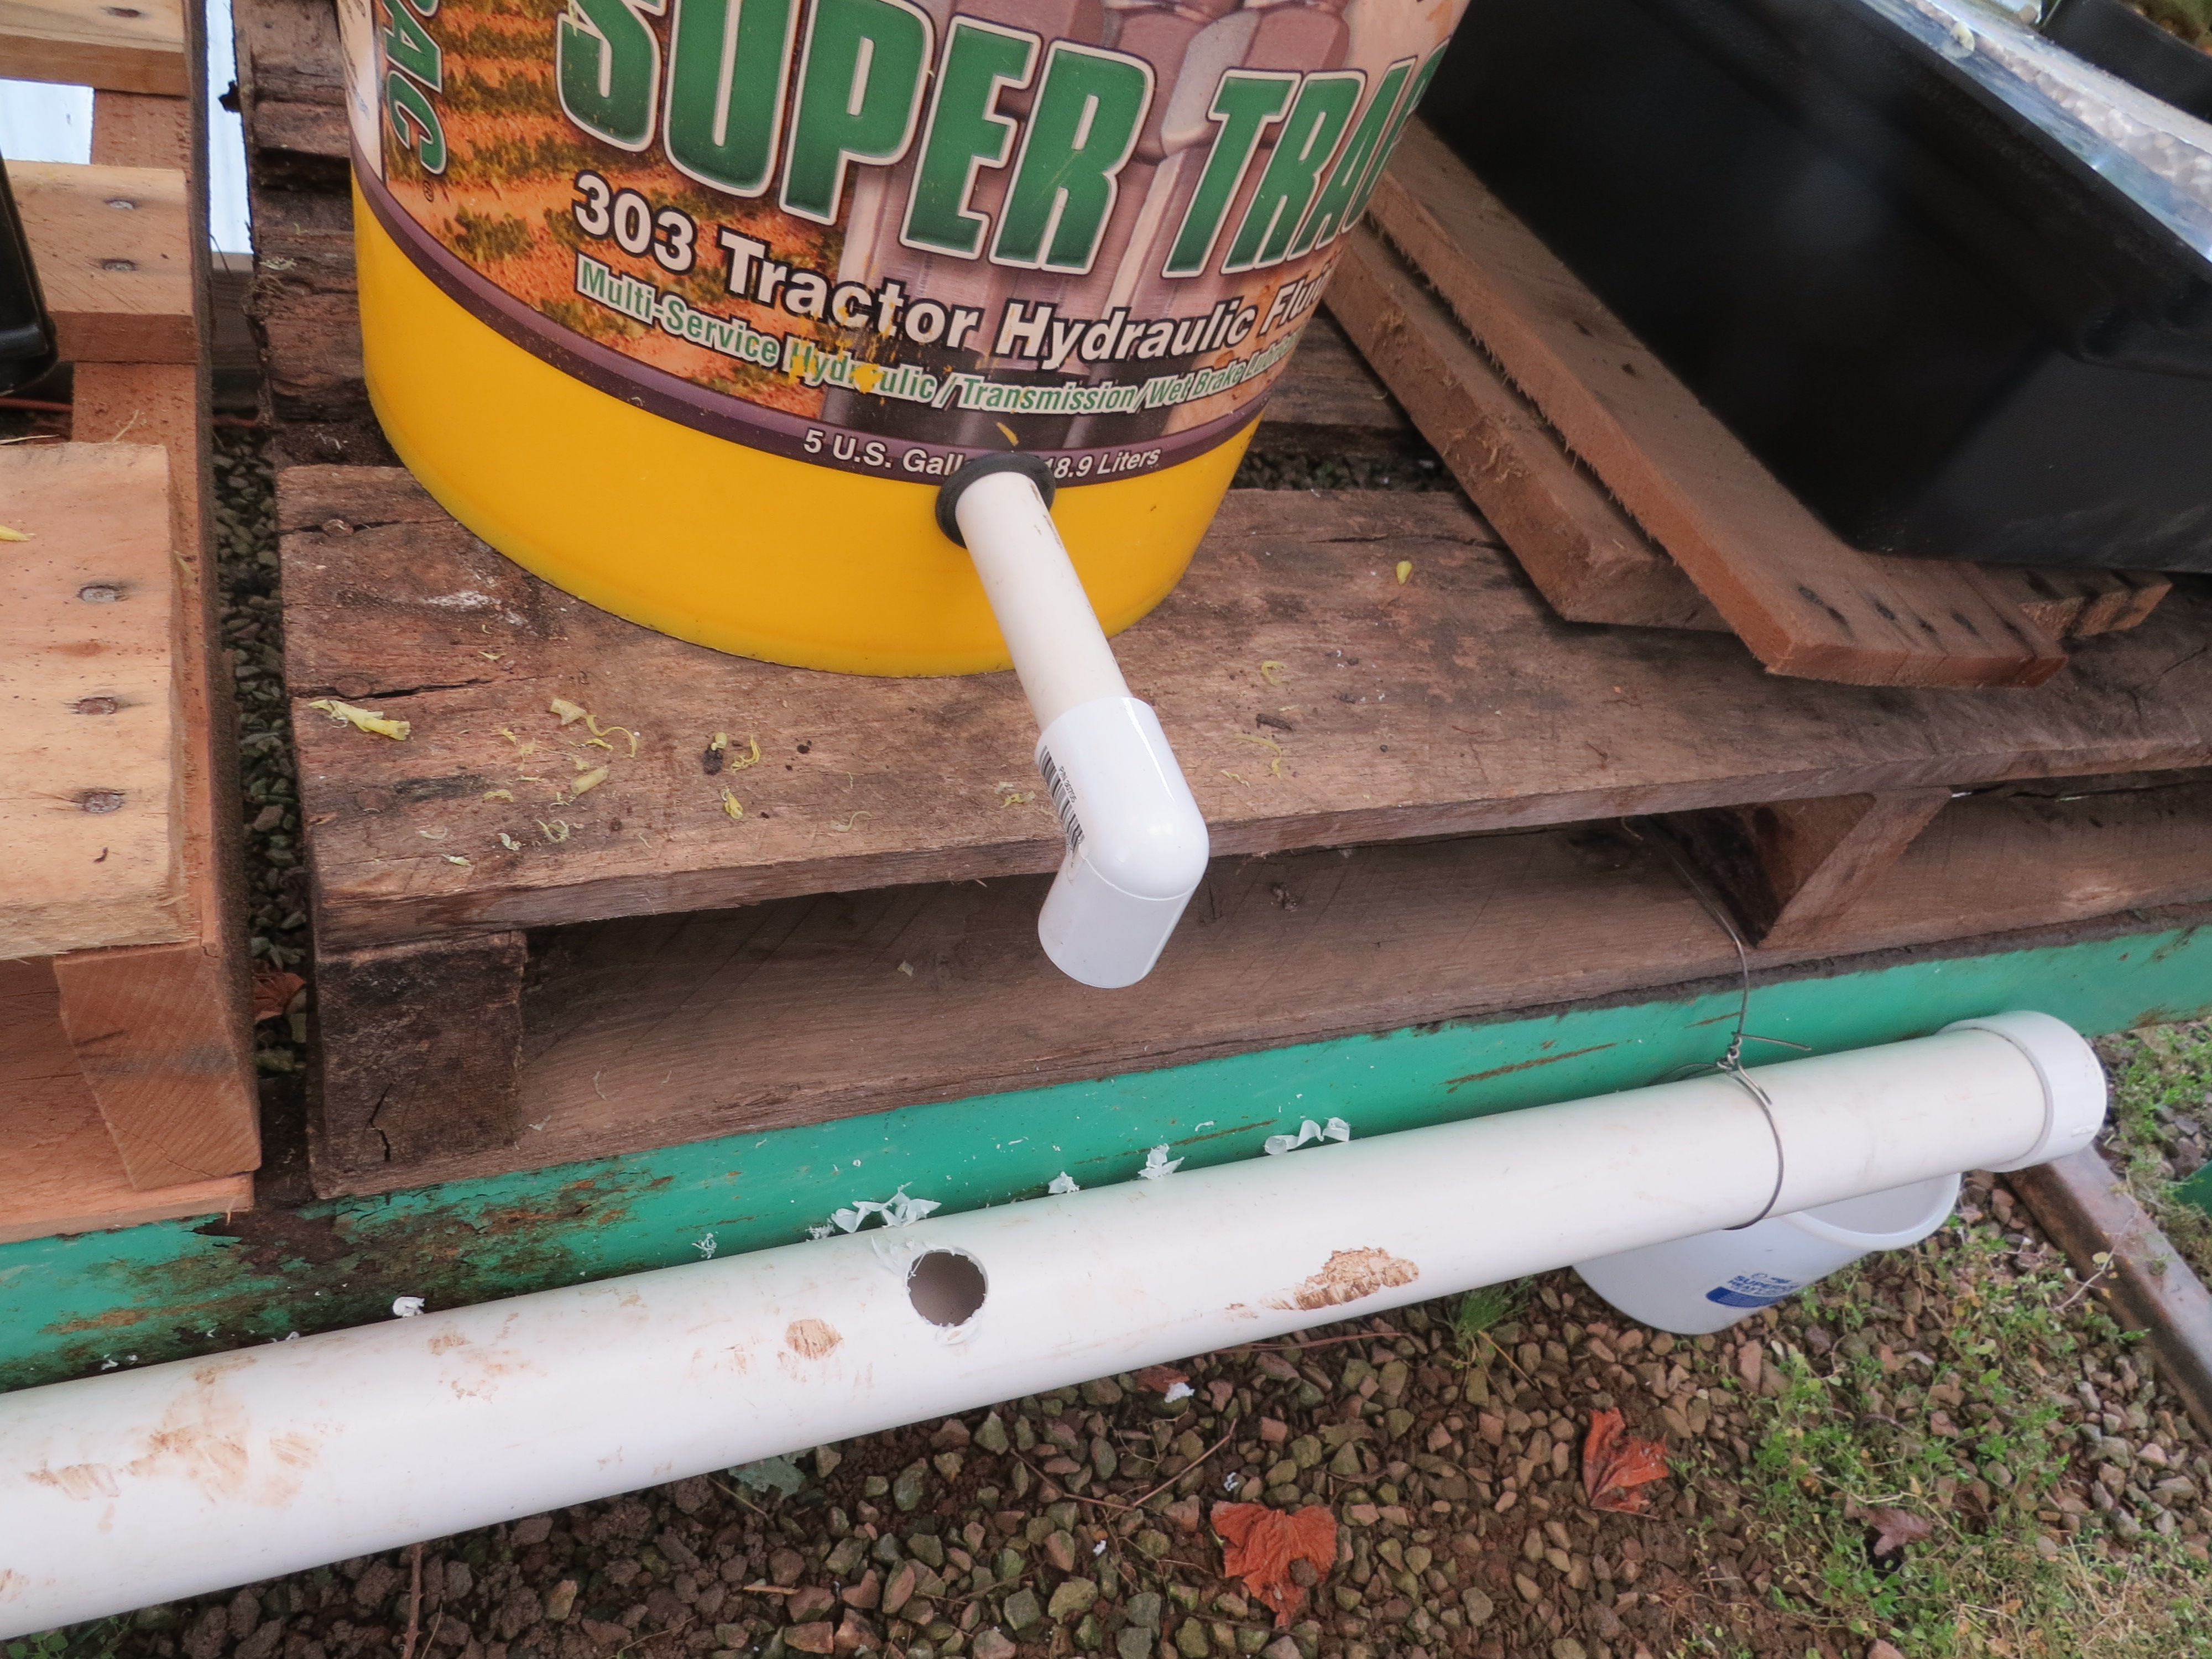
Using a hacksaw cut a piece of 1/2″ PVC the length that you need with about 2-3″ inside the bucket. Use a file to remove sharp edges on the end that goes through the grommet. By slightly beveling the edge it also helps it to go through the grommet better. It is a tight fit. Put one hand inside the bucket to hold the grommet and with the other use a firm, gentle and careful twisting of tube until it is properly in place. Add a 1/2″ elbow on each end.
Face the elbow down. This is your drain system from the bucket.

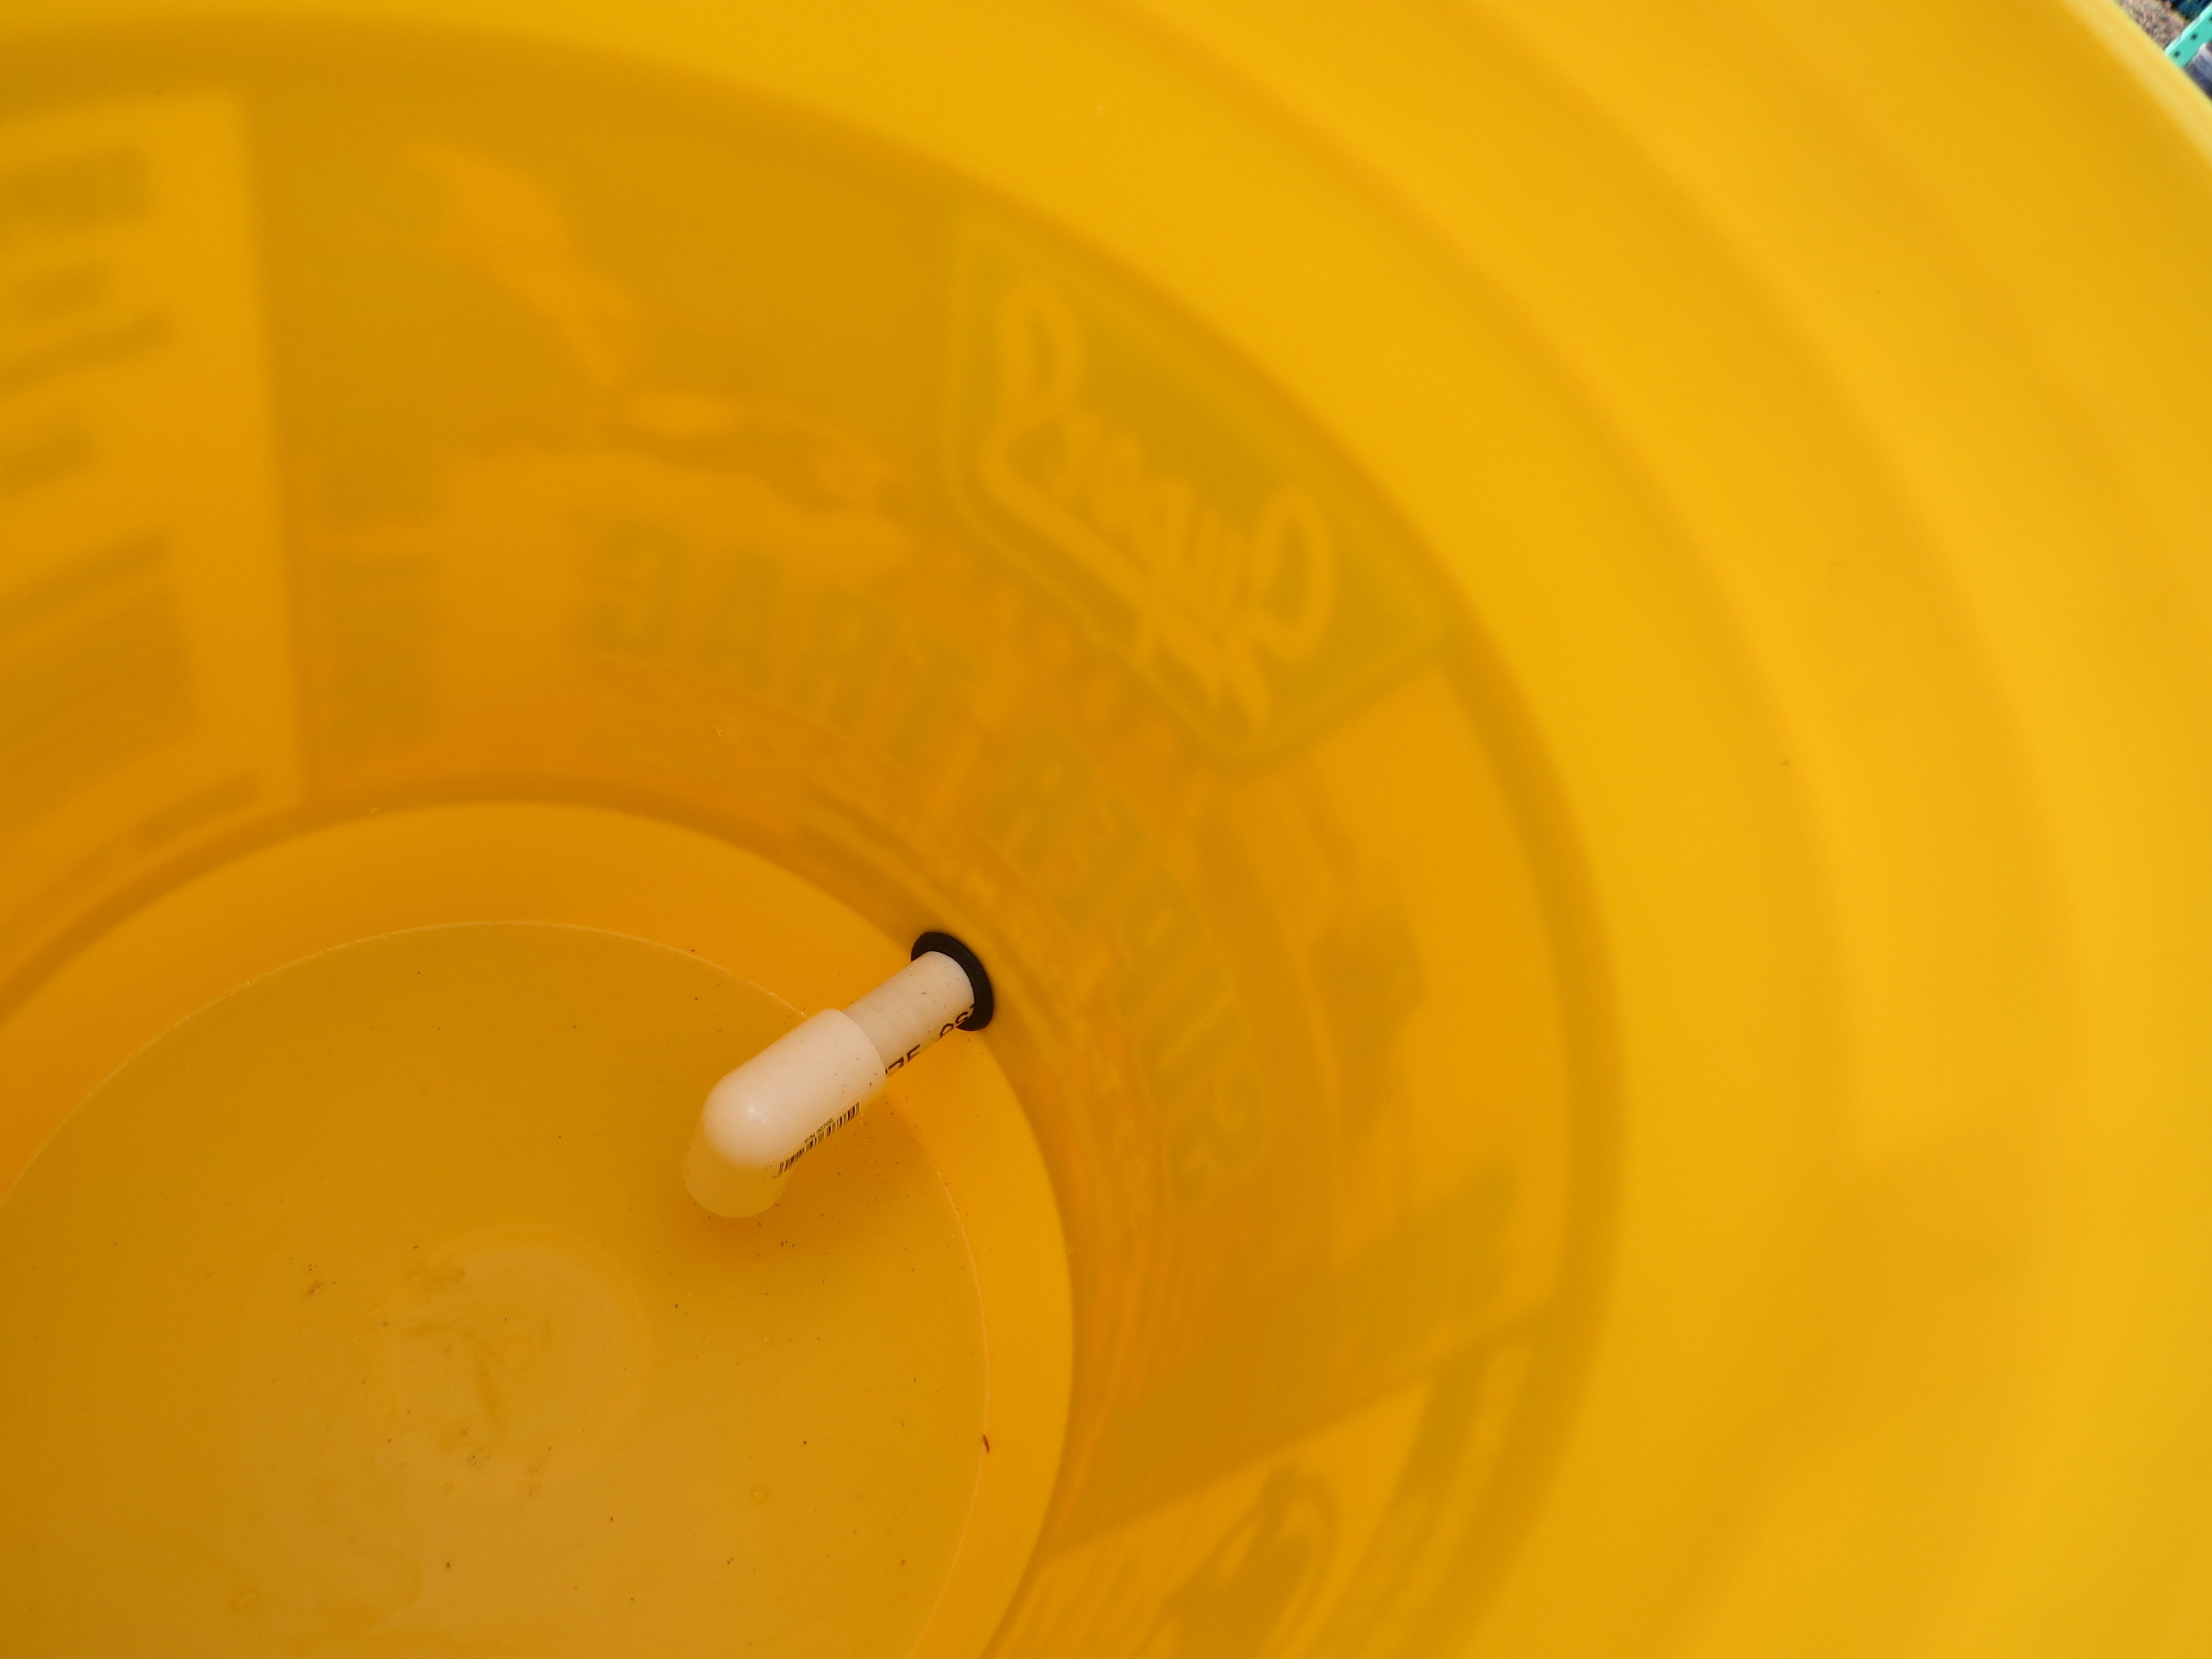
Put the 5 gallon paint strainer net in the bucket. It is a wonderful fit.
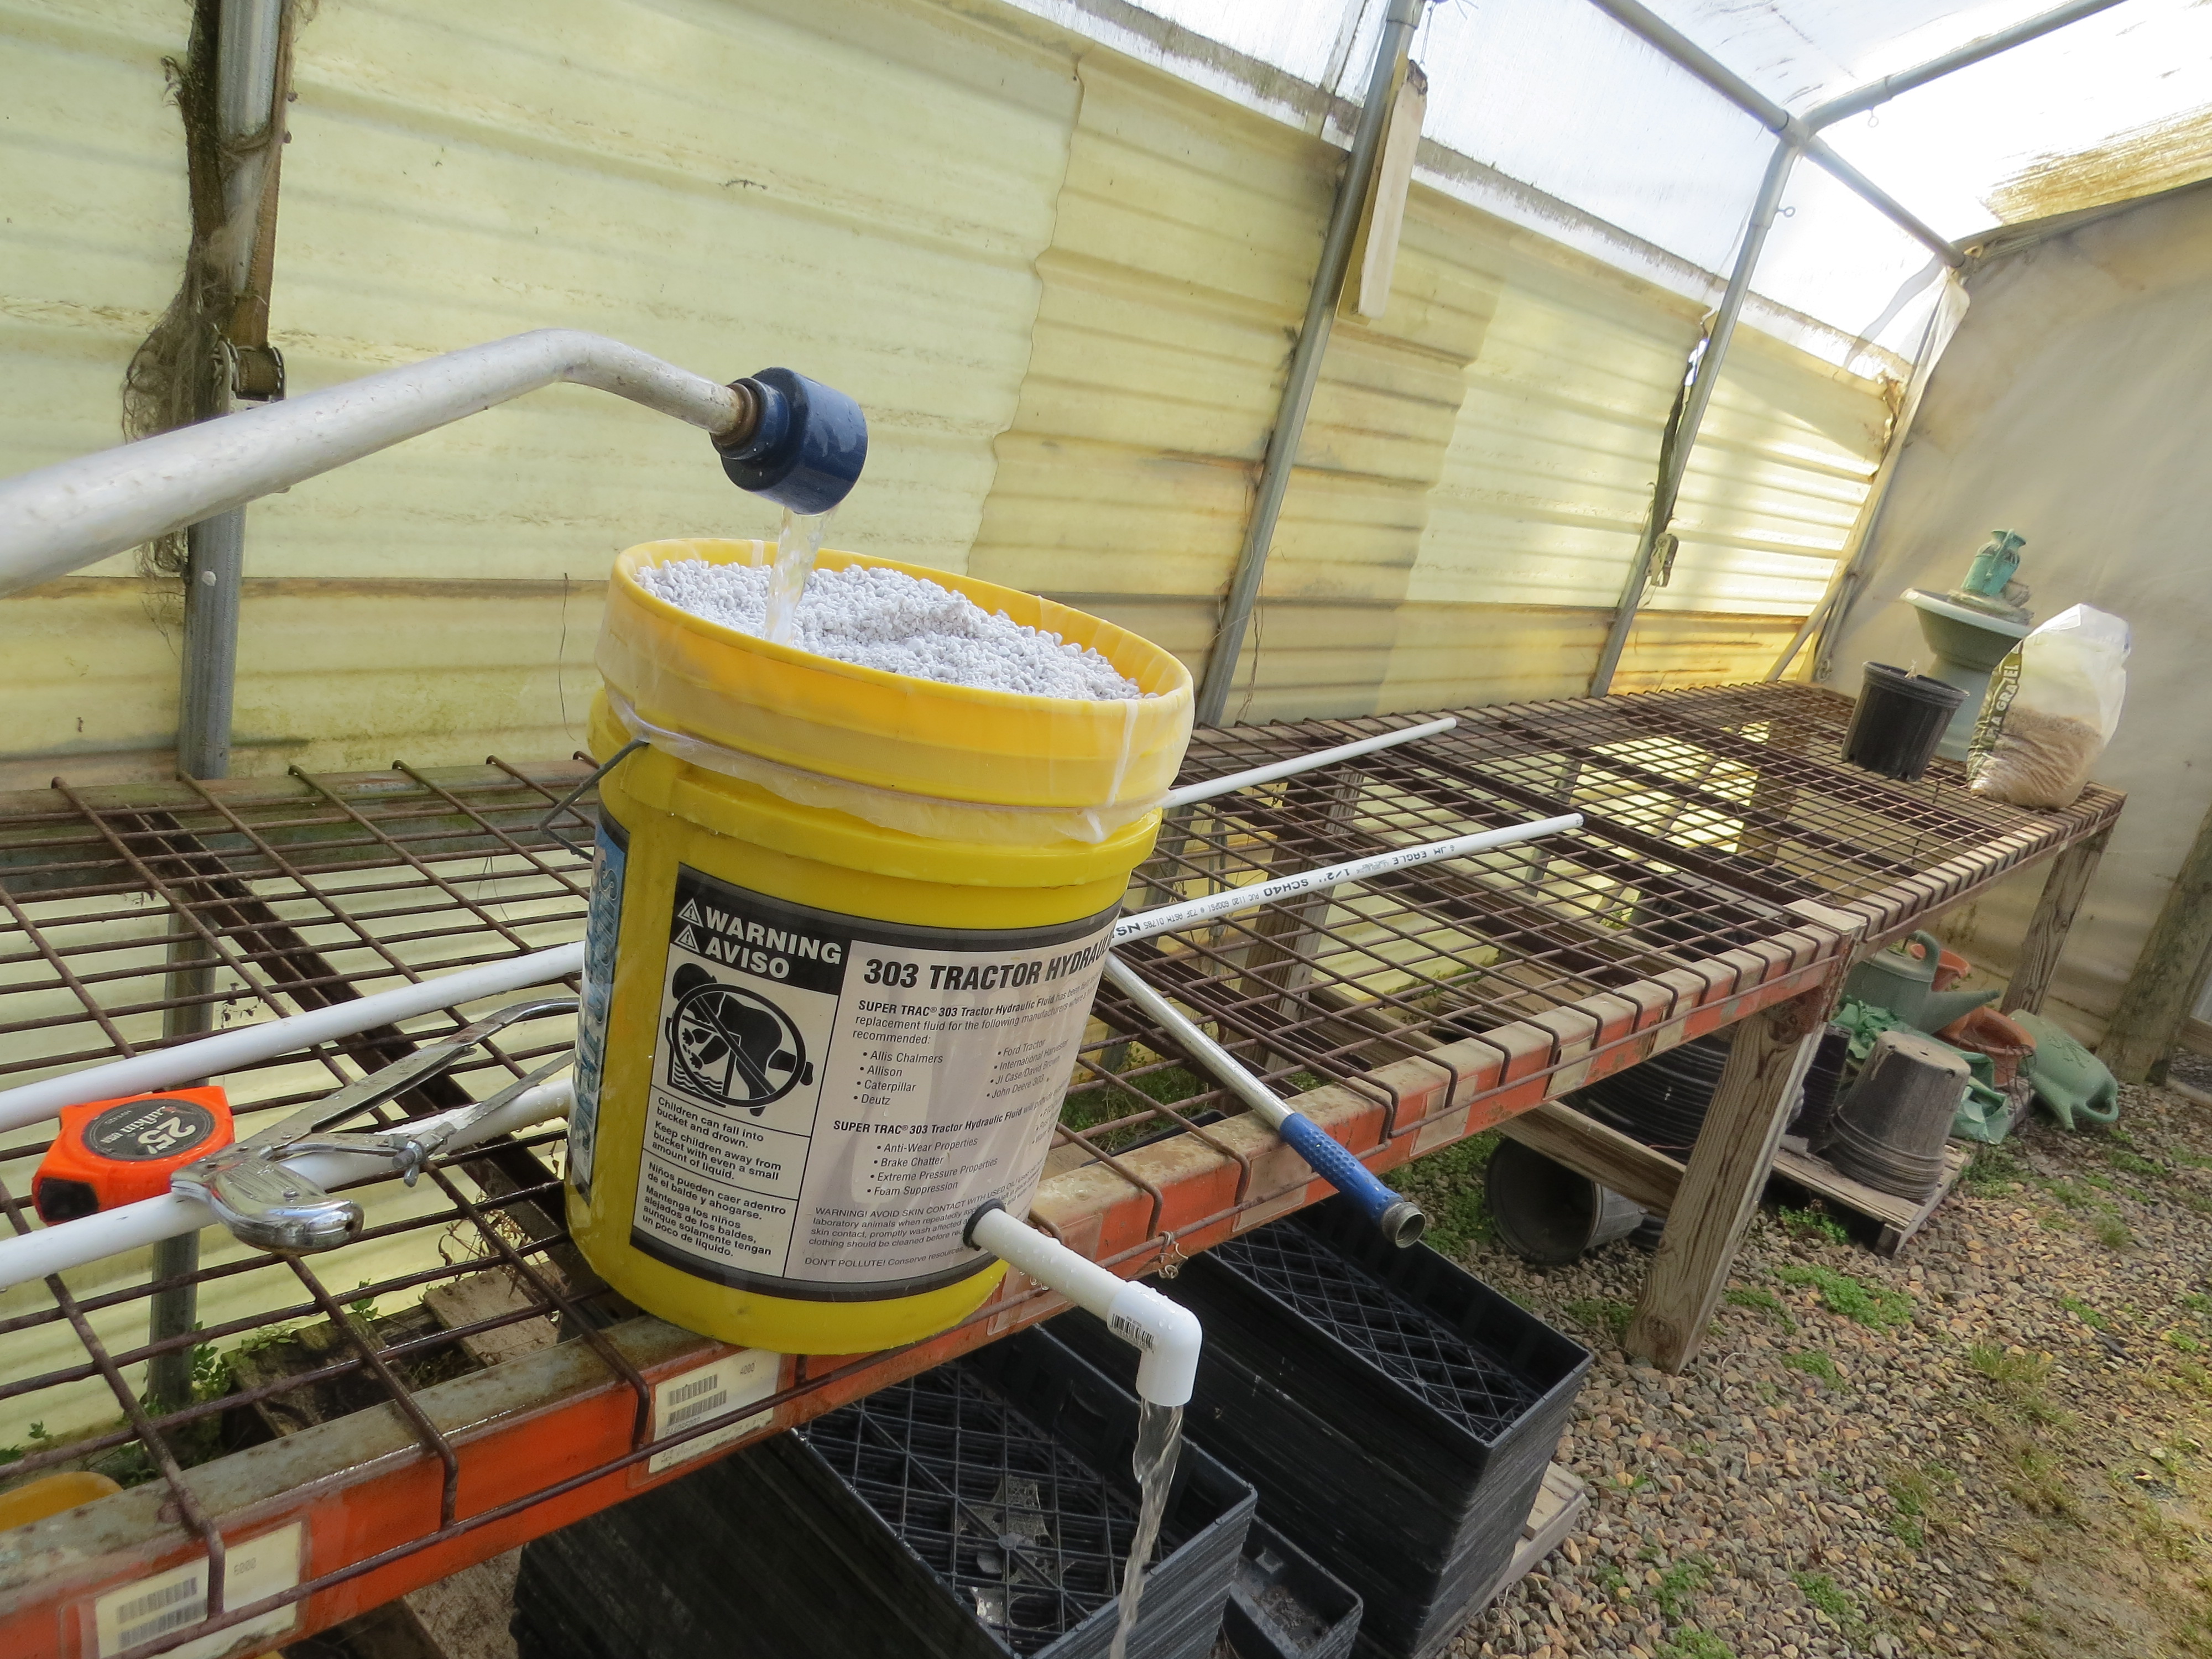
Fill the bucket with perlite and rinse with water until you have a steady flow out the drain pipe. This will settle the perlite and also remove some of the dust. Refill if necessary. After it stops draining set it in place.
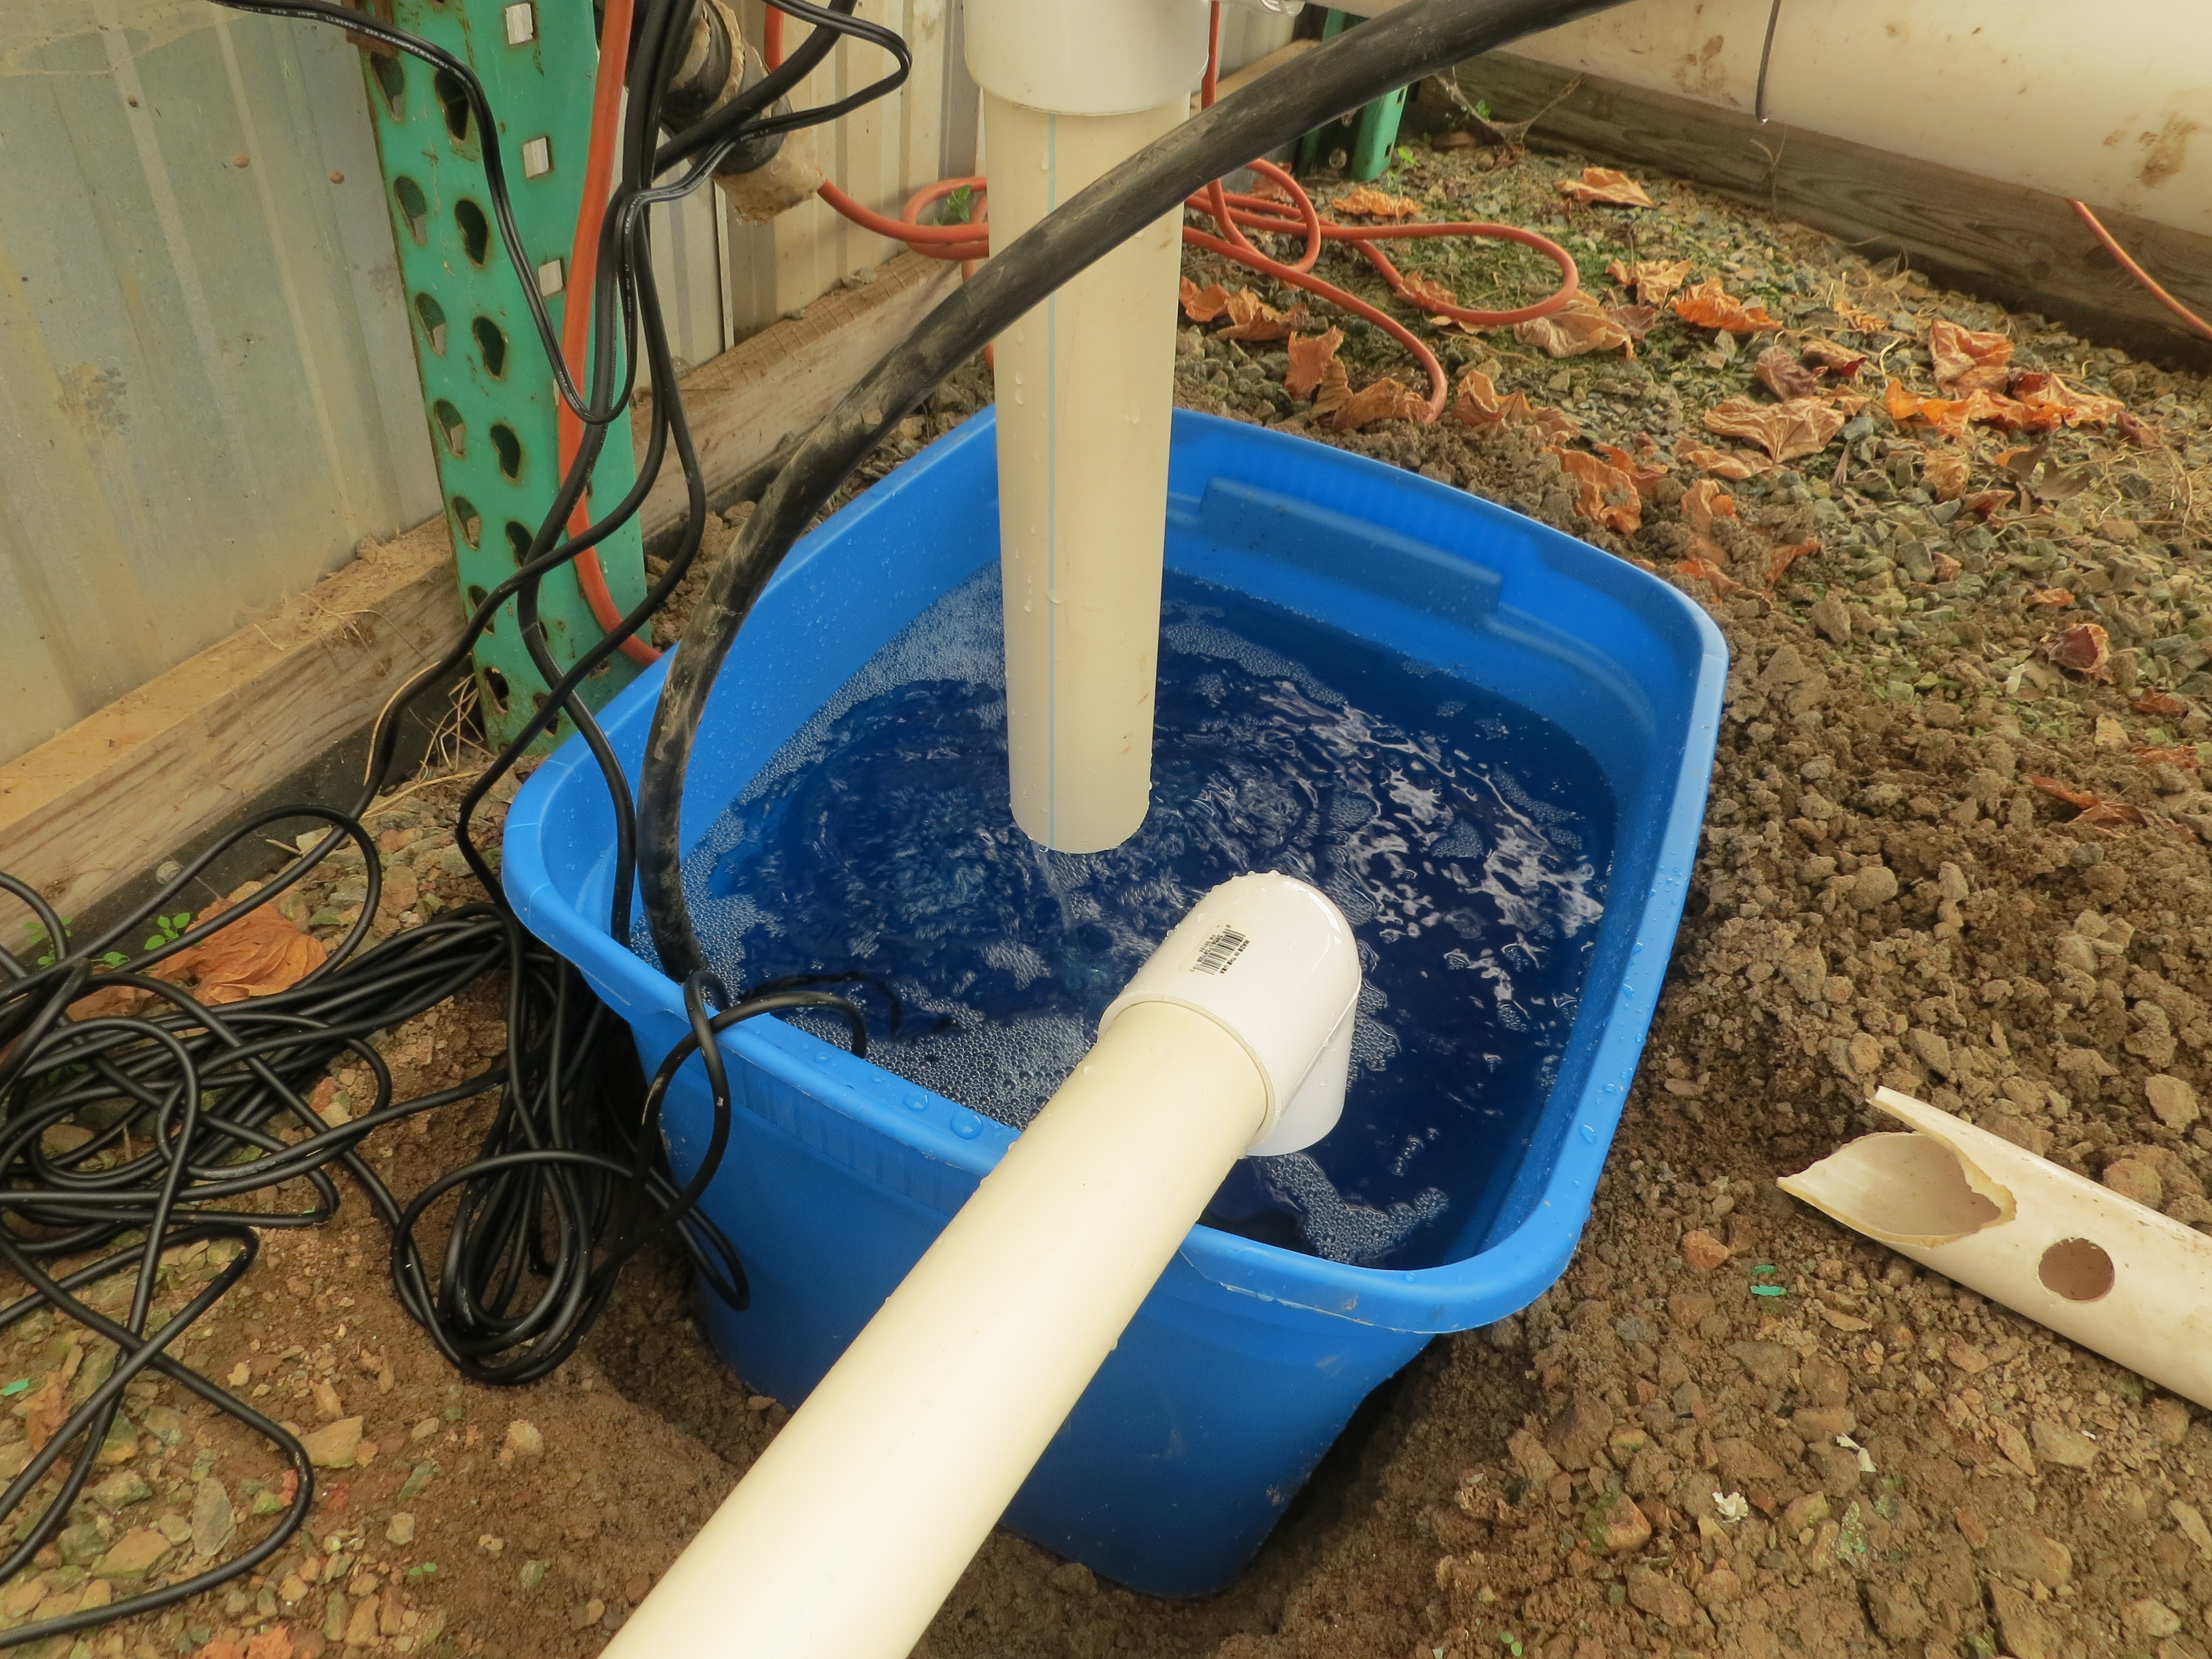
This is my tote filled about 3/4 full with fertilized water, the air stones and water pump. Right now I am using the same fertilizer mix as I used with the flood table. 1 T. Peters lite per gallon of water. I need to go back and listen again to the videos as I know he had a special mix for tomatoes. I am hoping I can use the same tote for my broccoli, cabbage, squash, cucumbers and tomatoes. Time will tell! This is a learning experience and you get to see me learn!

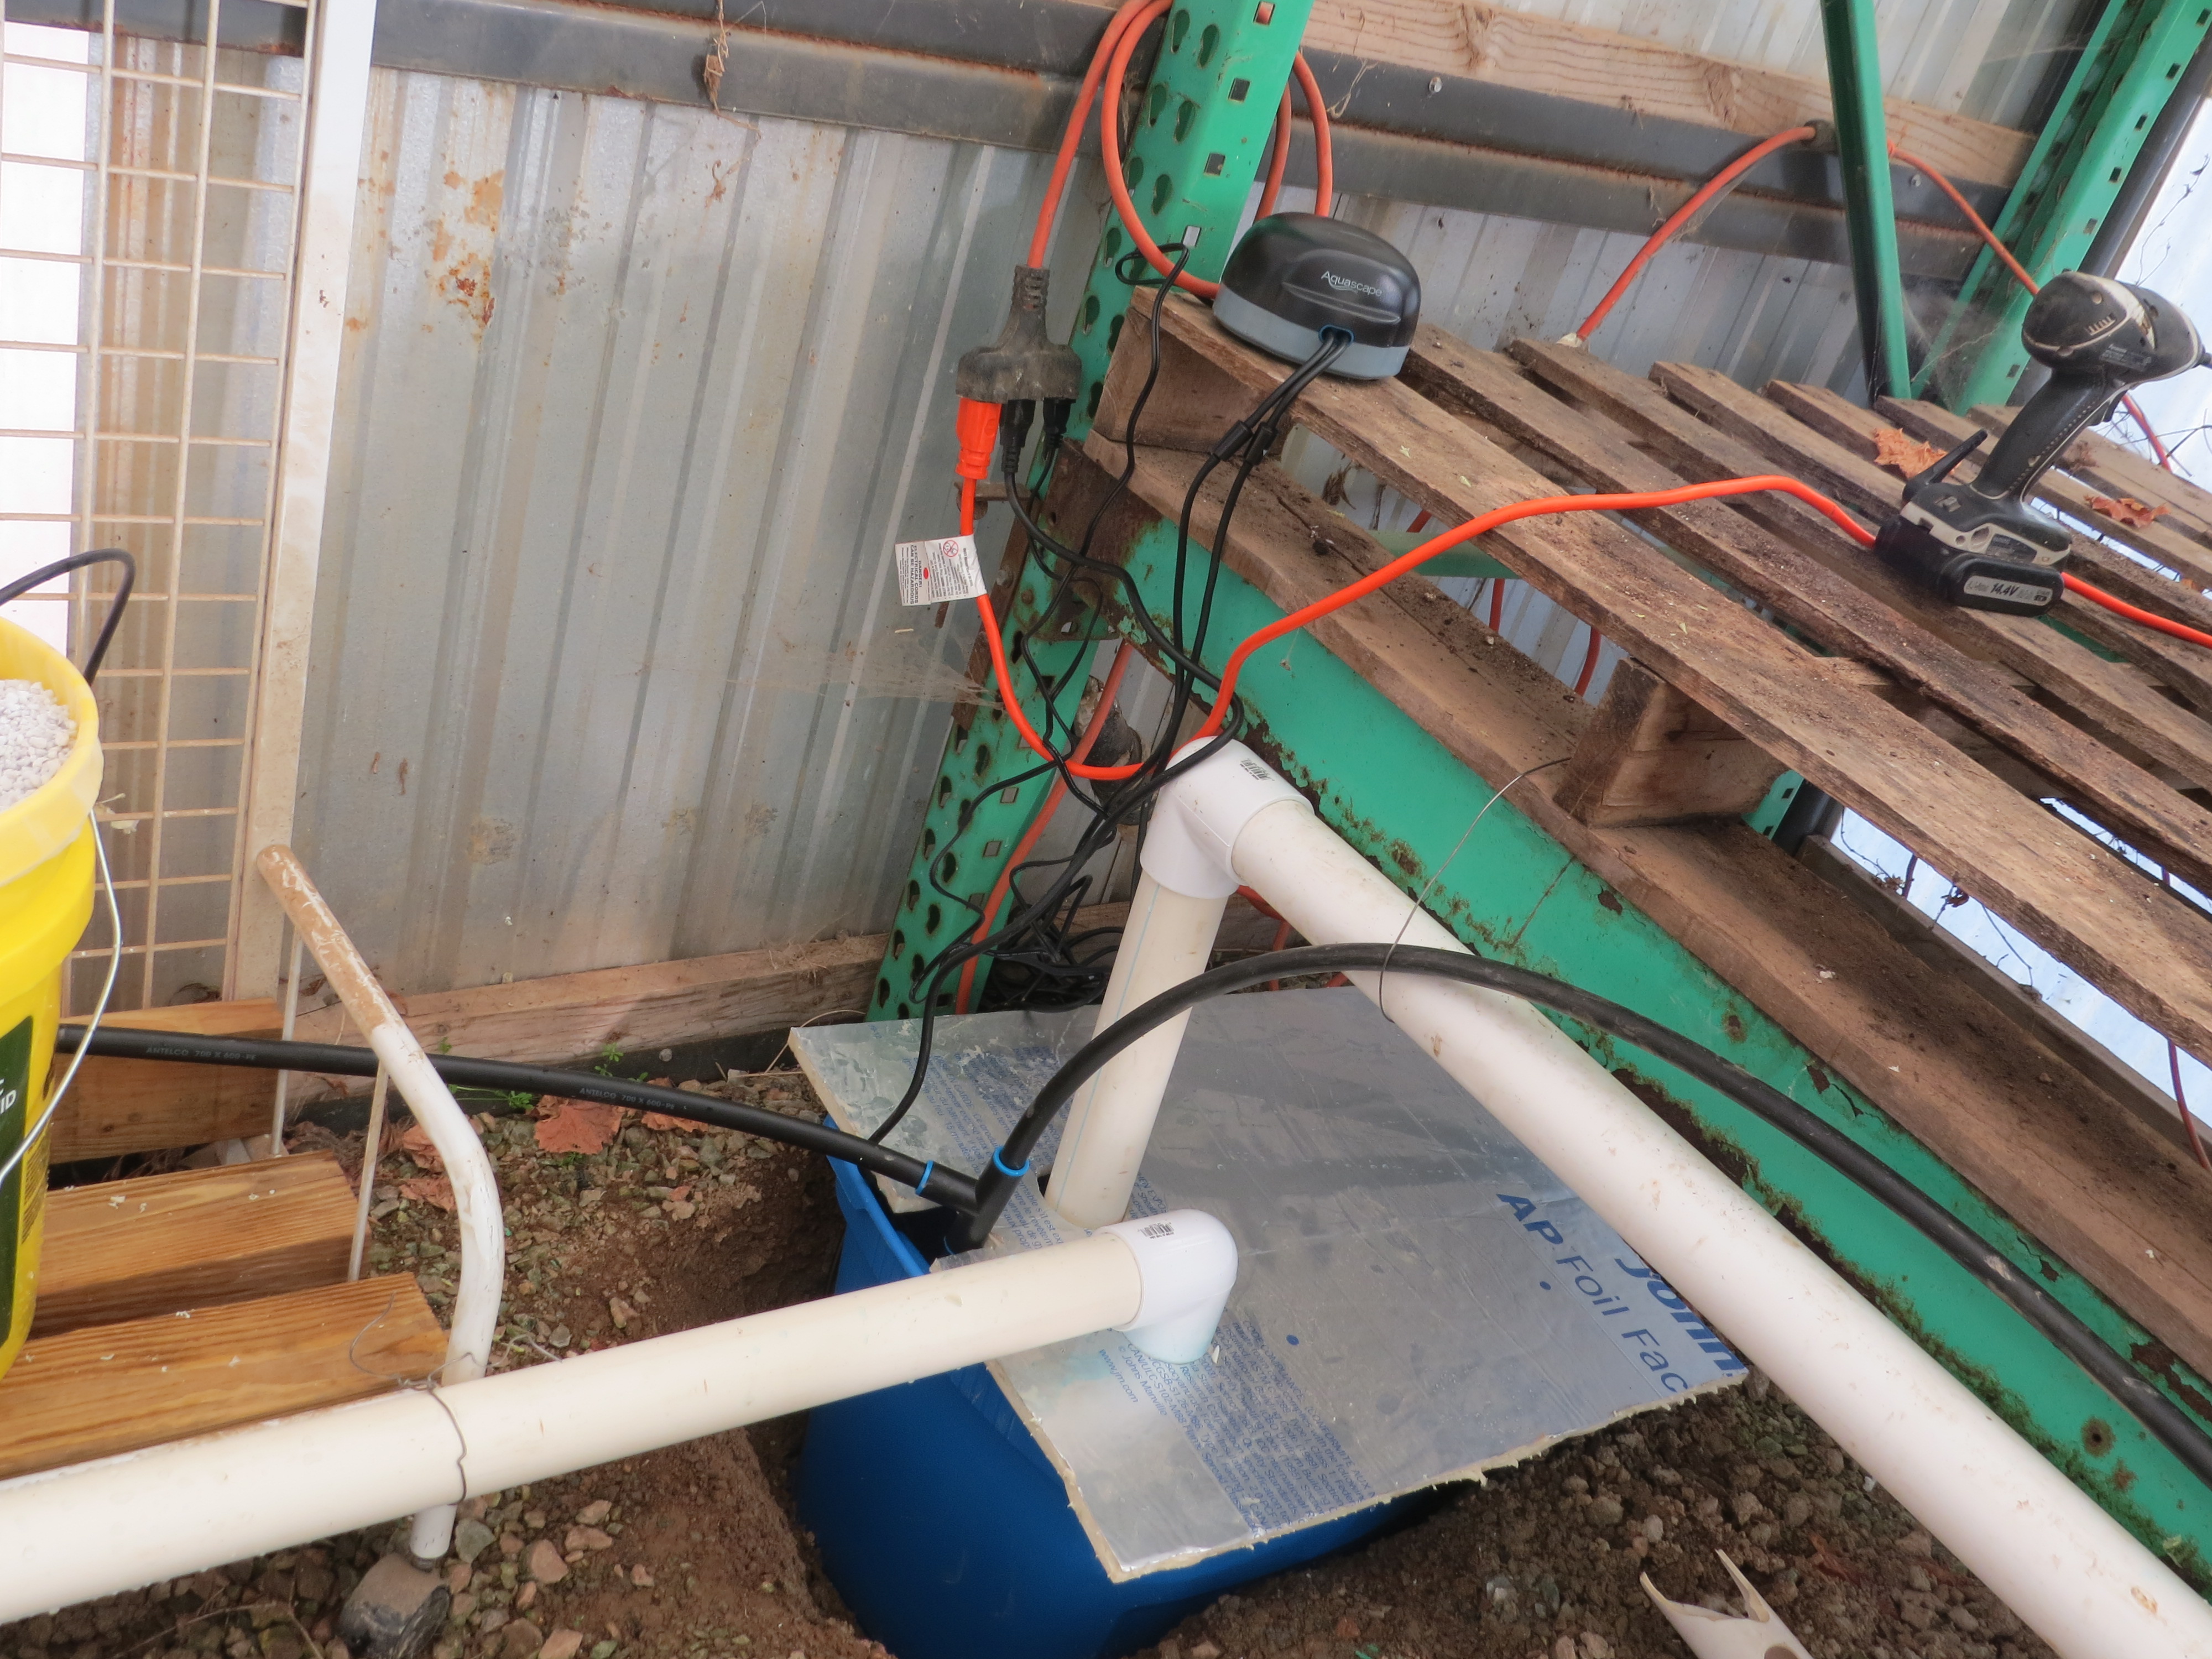
The 2″ PVC is my return or drain line. On the one end put a 2″ cap and the other end a 2″ elbow to drop into the tote reservoir. I have it on a slight slope so that it drains well. Then hook the 5/8″ Antelco tubing to the water pump and run it along the drain tube. I covered the tub to prevent evaporation, algae growth and to keep the water clean. Note the air pump sitting above it on the pallet.
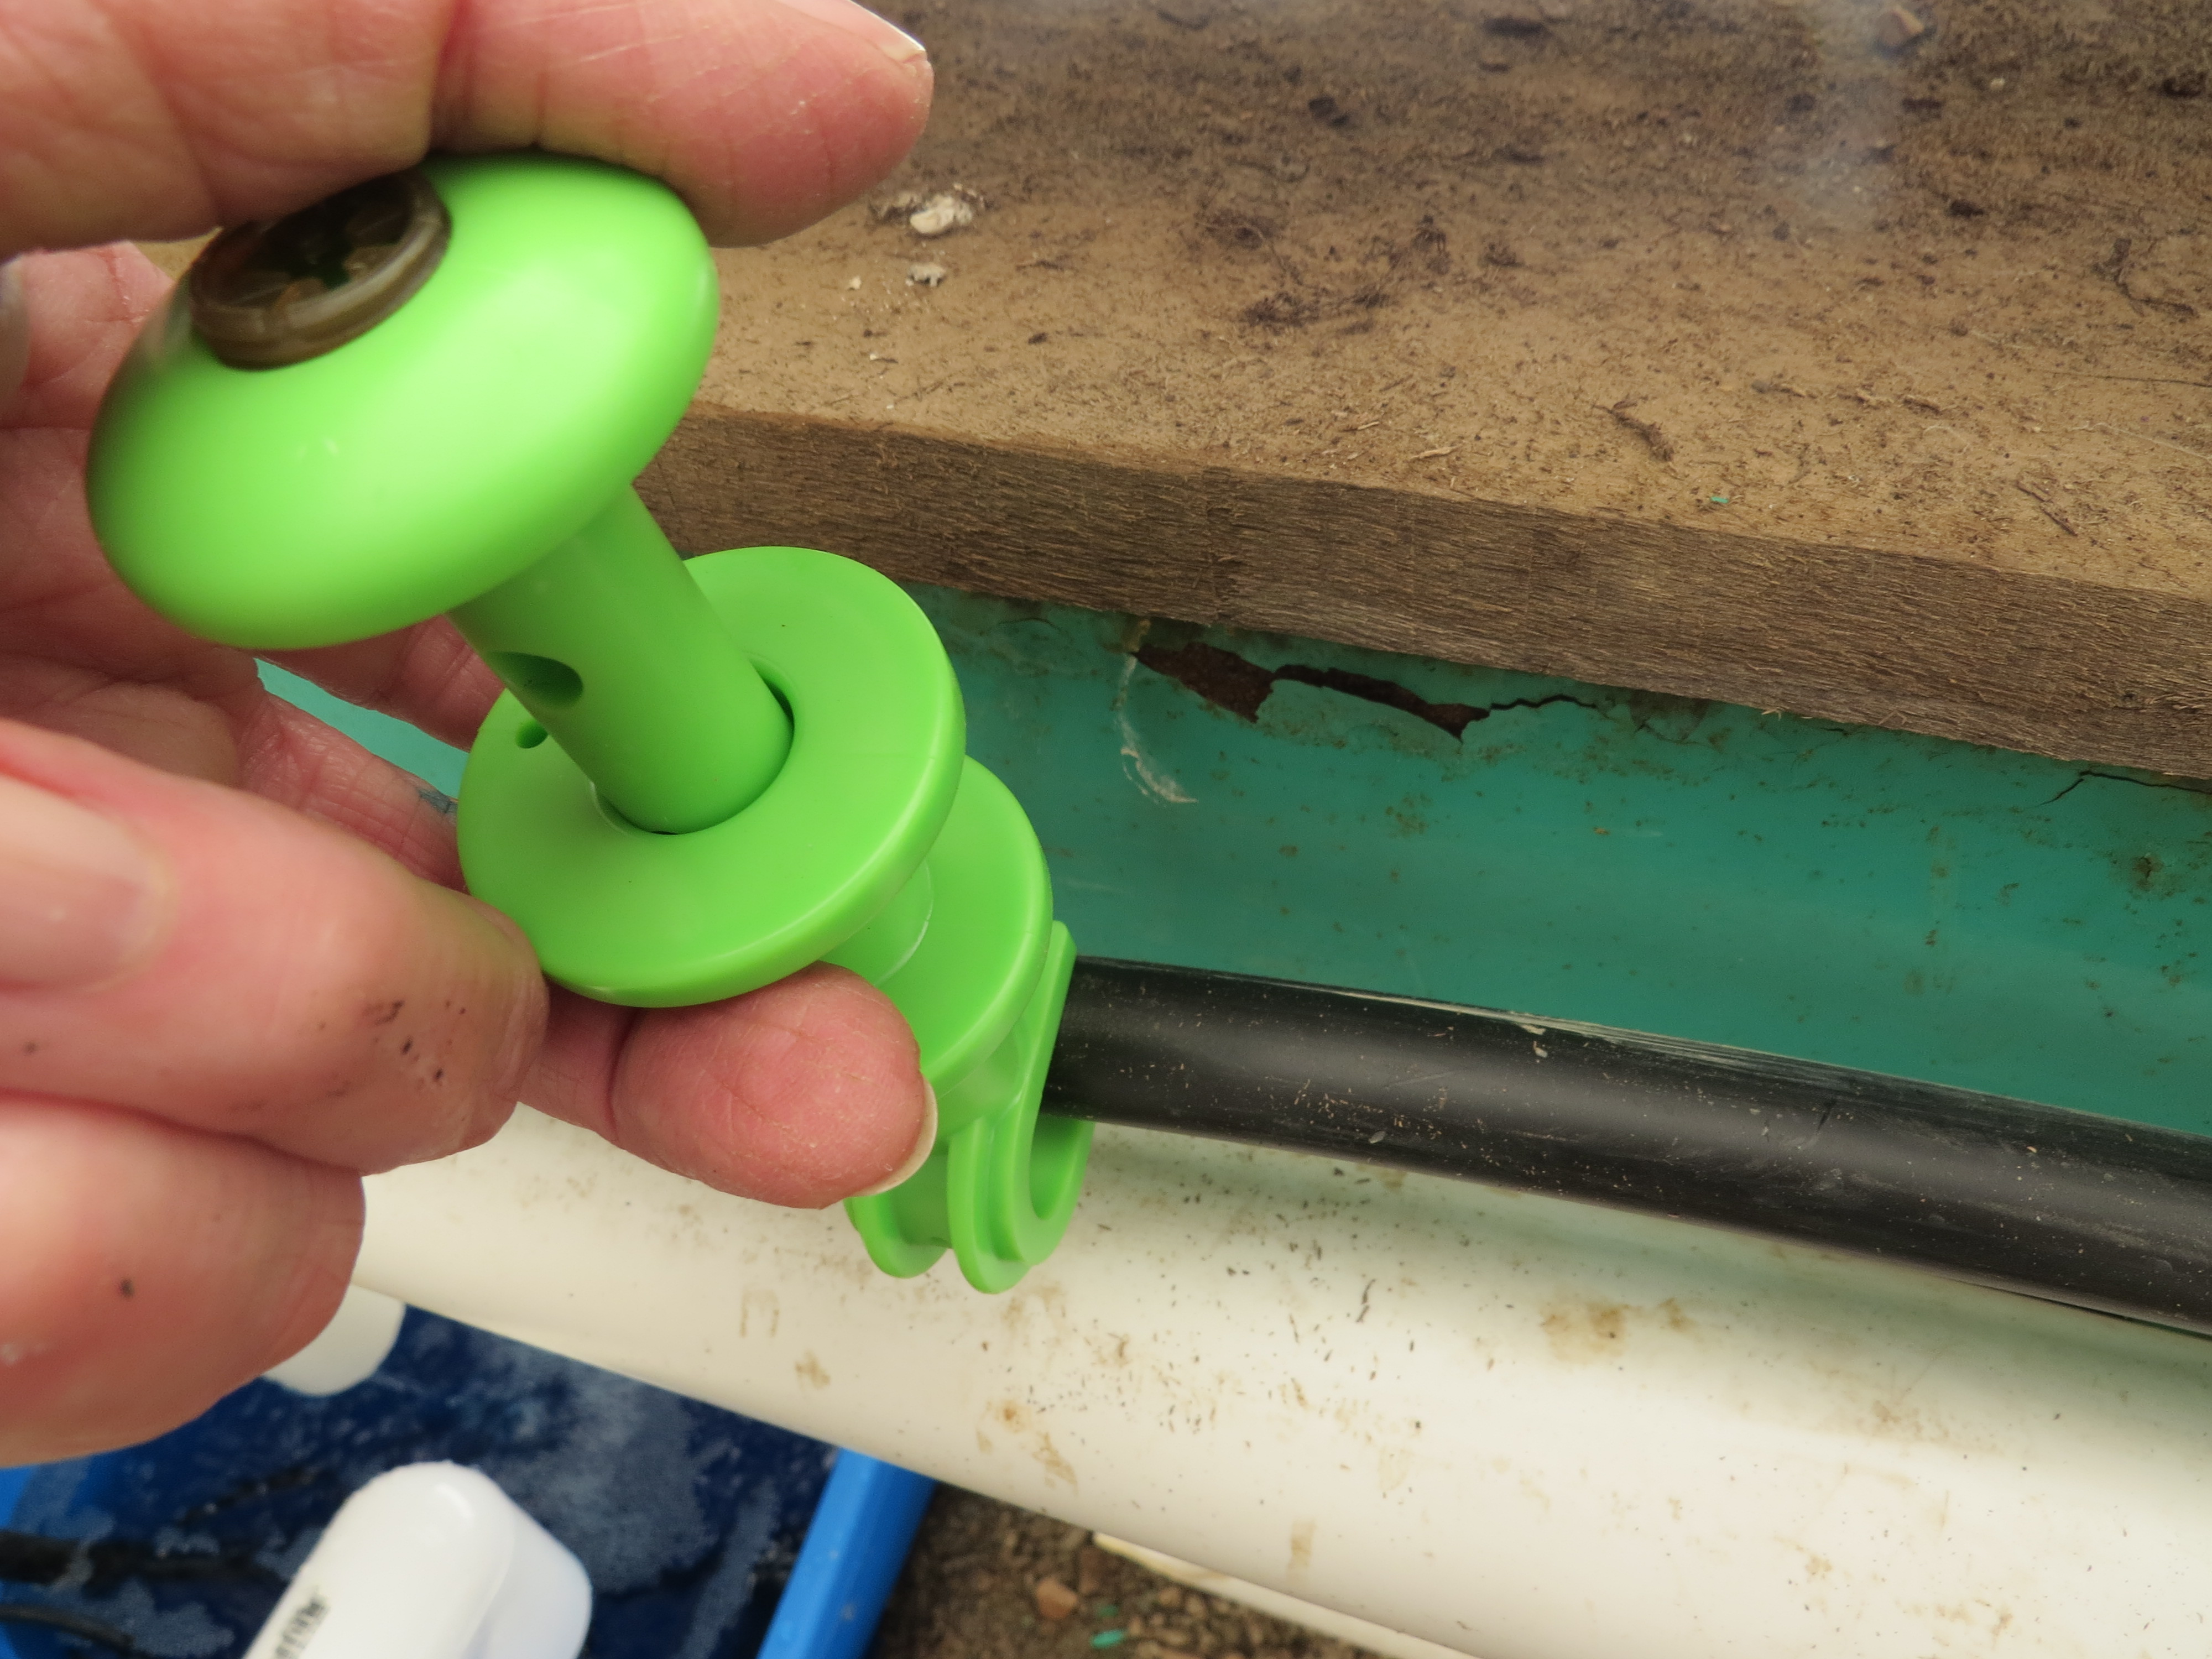
Use a punch tool to pierce a small hole in the tubing.

Insert one end of the connector into the spaghetti tubing and the other end push into the hole in the mainline tubing. The spaghetti tubing needs to be long enough to go into the top of the bucket. I have several inches inserted into the perlite to help hold the tubing in place and also so it is near the roots of the plants.
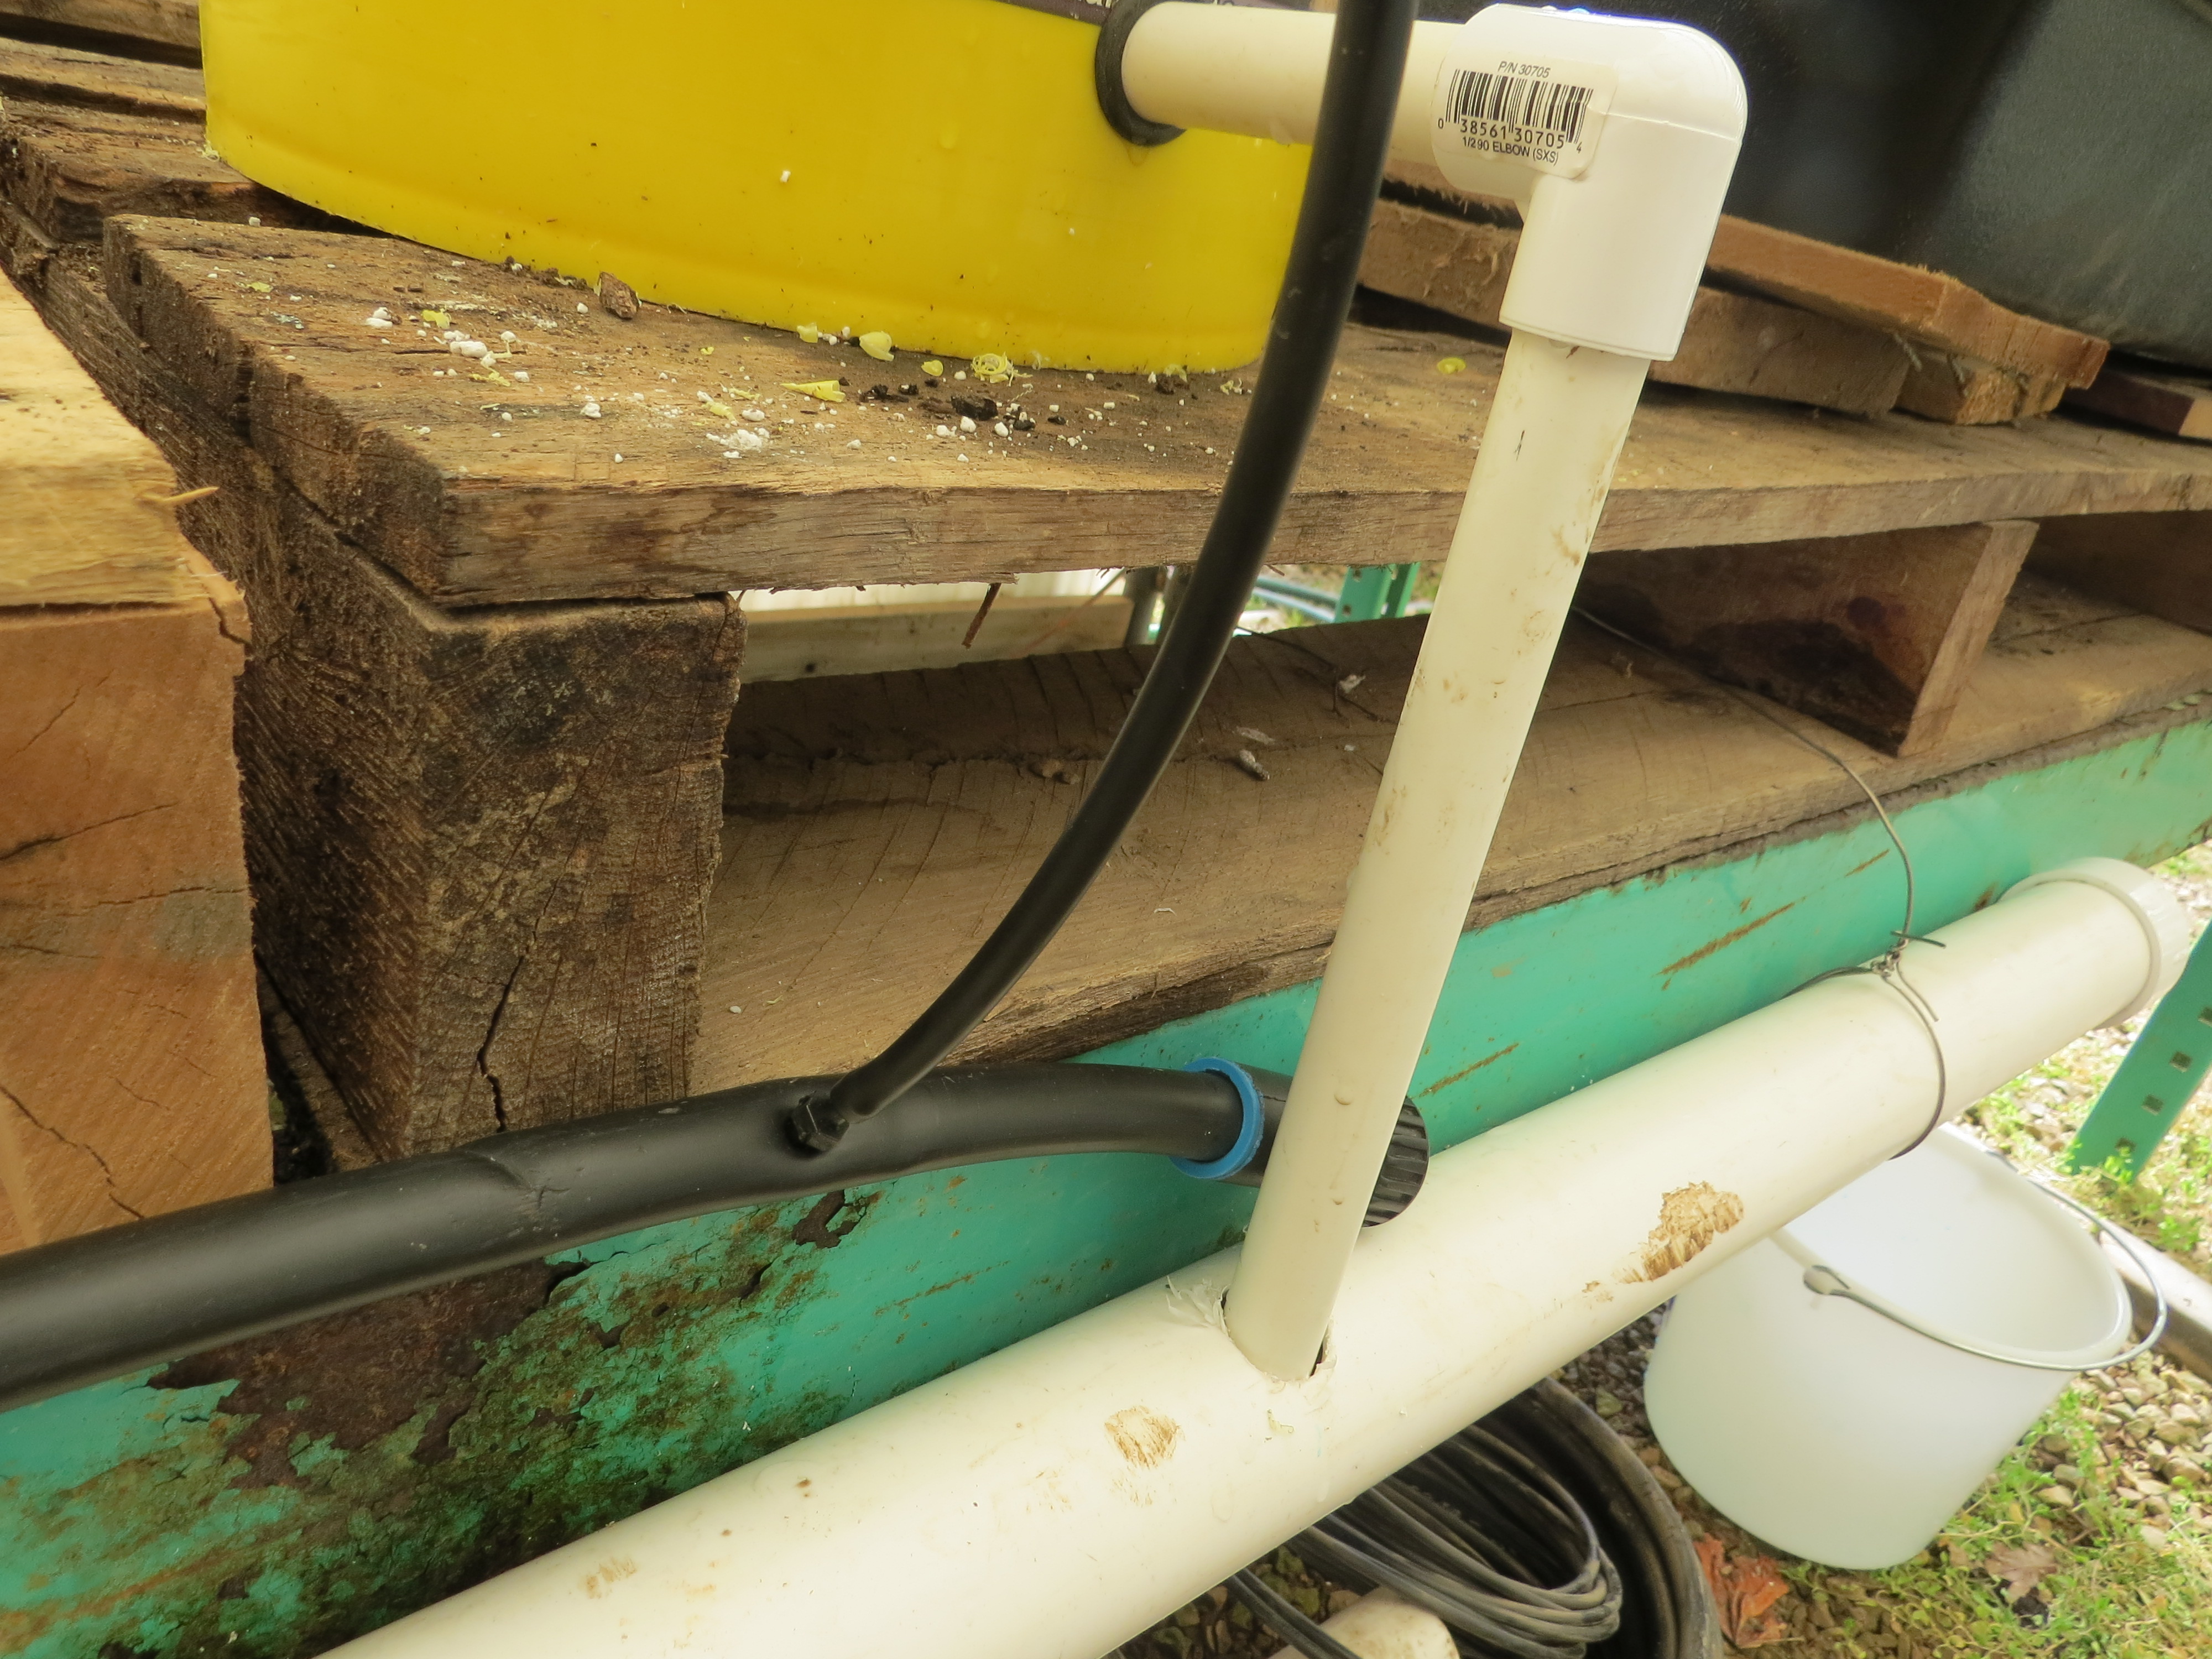
Insert a piece of 1/2″ PVC into the elbow and down into the drain line.
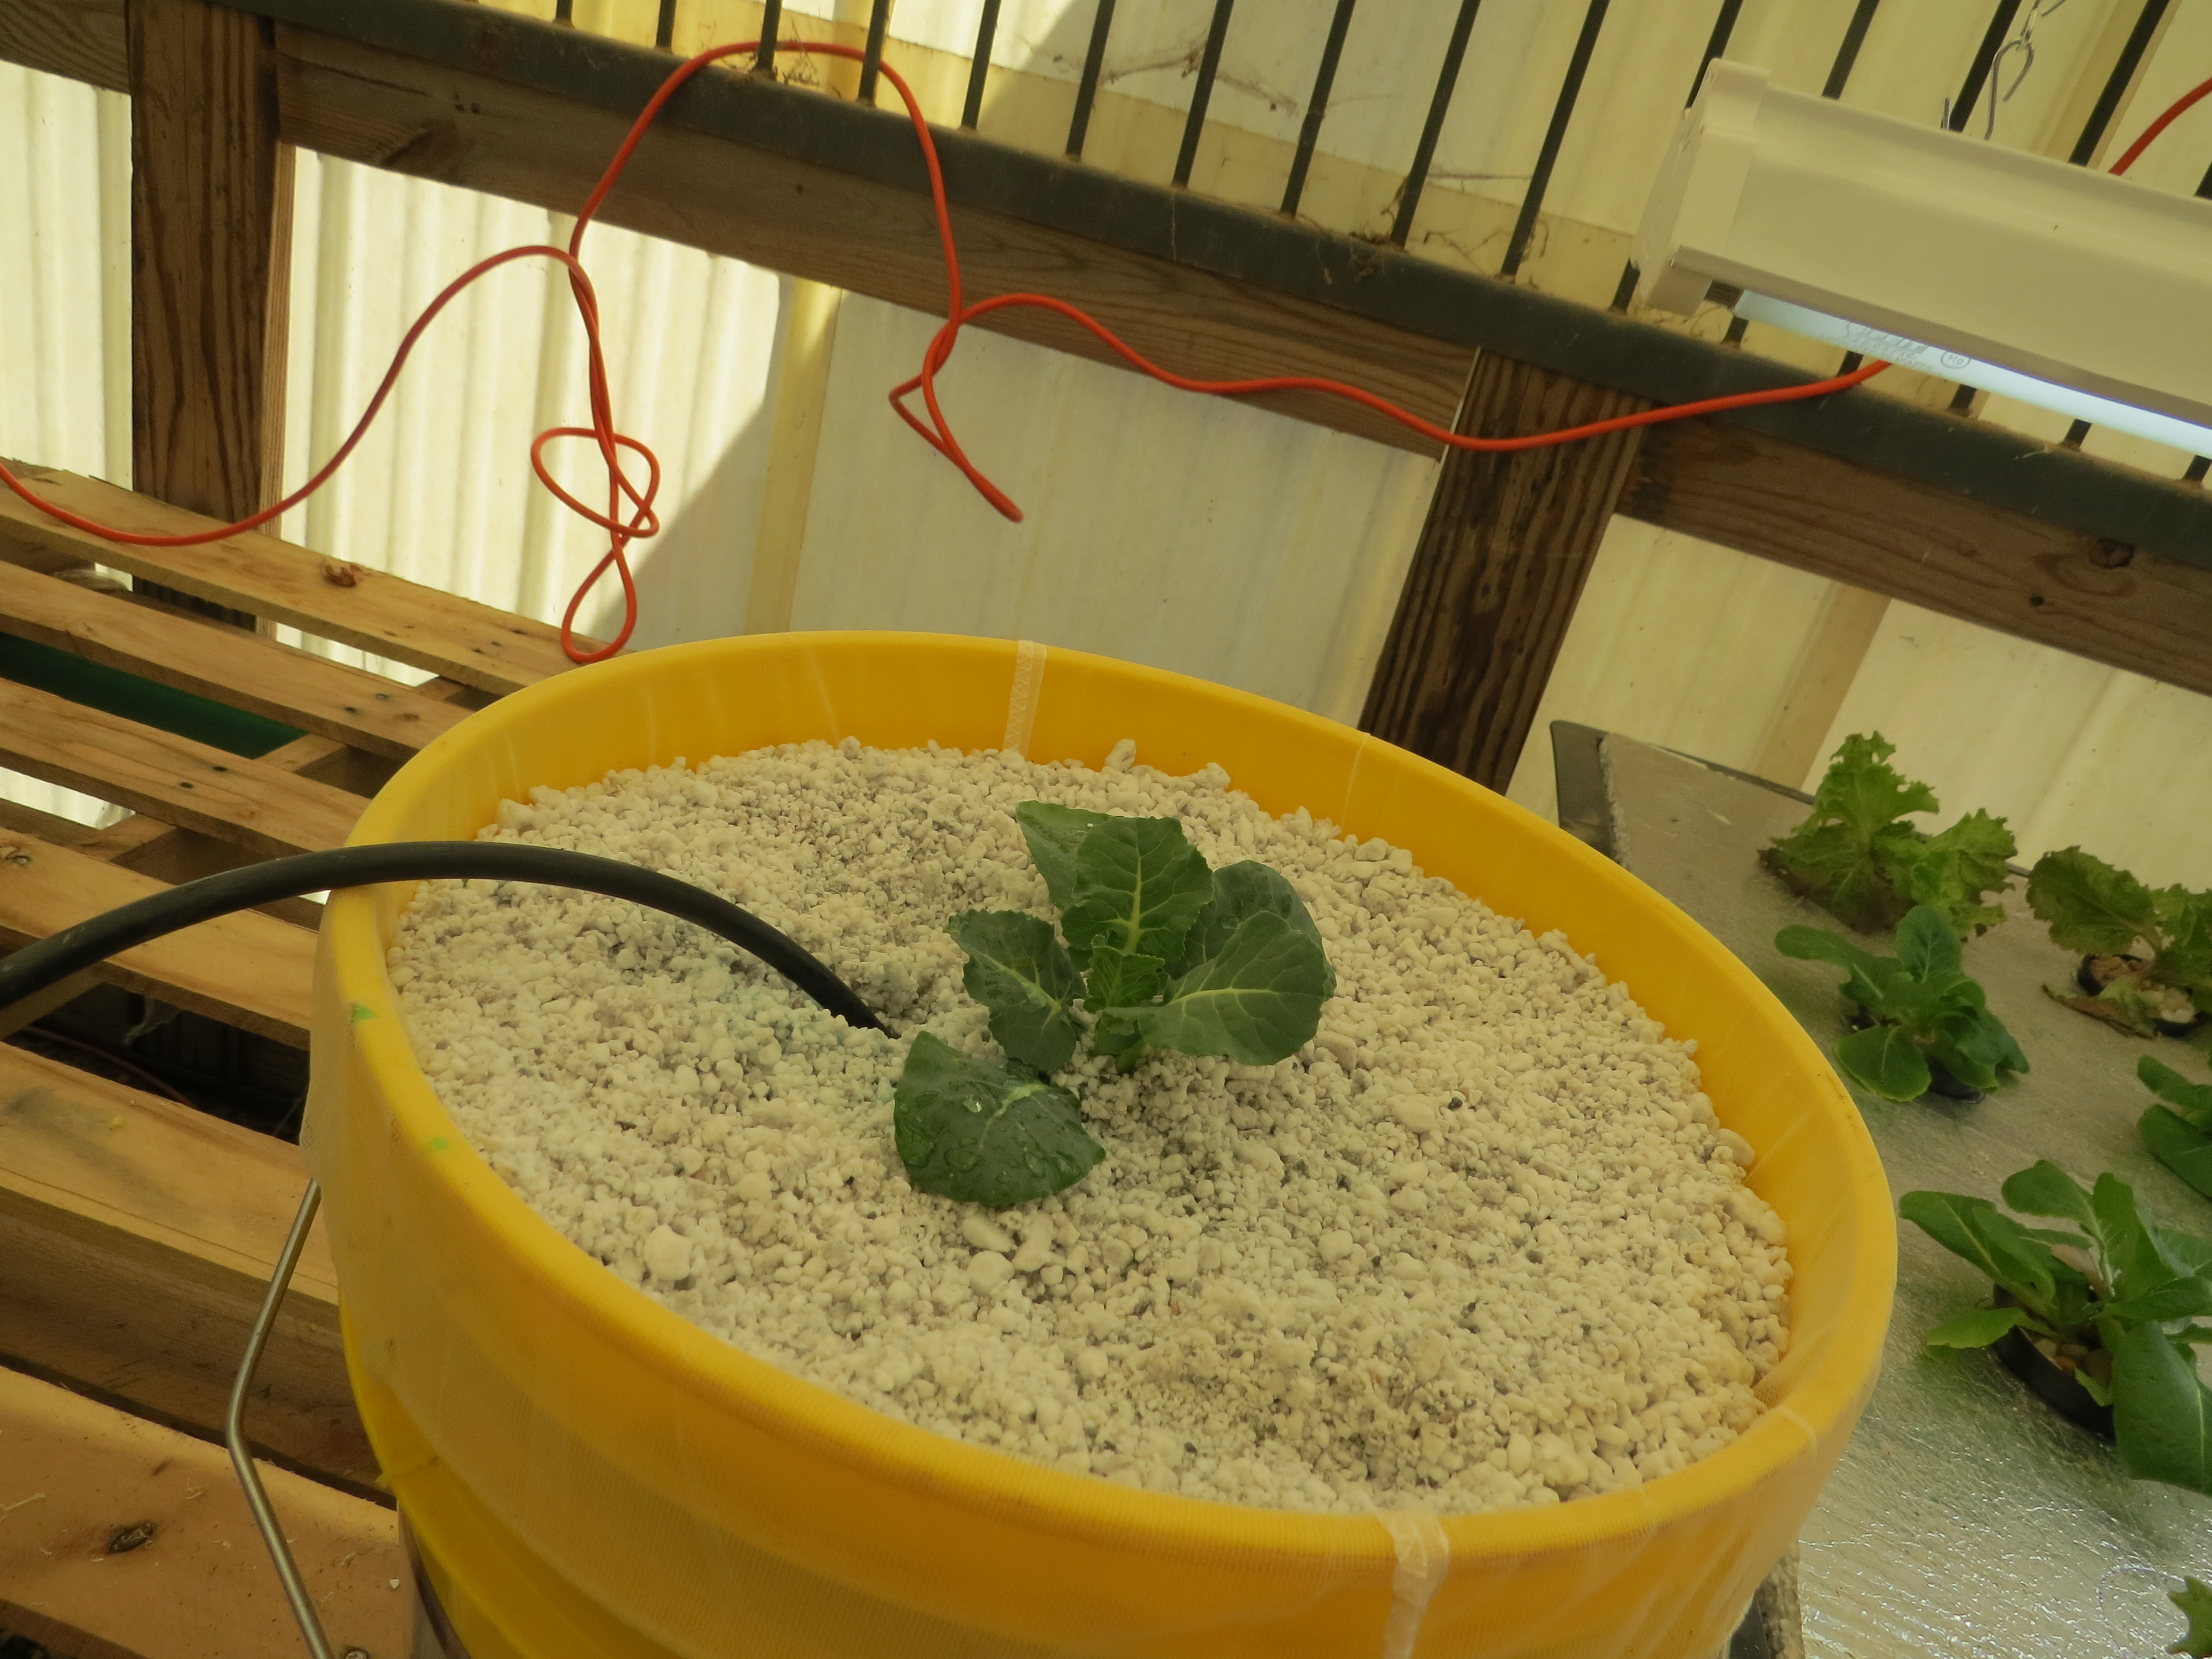
Wash the dirt off the roots of the plant (this is broccoli) and plant into the perlite.
I set up this area for my tomatoes (two buckets on the left) and cucumbers (the one with wire back for climbing). I plan to plant 4 cucumbers in the same bucket. The bucket on the far left is an award winning heirloom tomato, potato leaf Marizol Bratka, given to me by friends Bill and India Cox. The other tomato is an Early Girl so that I can have some early tomatoes in 45 days. This area is one reason is one of the reason I had to dig a hole for my tote to set in. I wanted the plants as close to the ground as possible because of their growth height and the drain needed to be able to sloop into the tote.
Today I only got six buckets set up but I plan to add a few more. I am thinking about adding a few strawberries. I have strawberries in my garden but my curiosity has me wanting to try. In a few weeks I will do an update on the progress of my vegetables. I anticipate some great things.
*****
Setup components, cost and where the items can be purchased.
- I purchased a 18 liter tote for my water/fertilizer reservoir. Usually the totes have lids and you can drill holes in the plastic lid for your tubes to come out of. I got my tote for half price as it was missing the lid. Of course it was the only one they had like I wanted so I will improvise with a piece of ply board. (Dollar General)
- I am using a 290 gph Danner Fountain Pump (Hertzler Farm & Feed): $36.99
- 2-outlet Aquascape pond aerator with 2 air stones (Hertzler Farm & Feed): $59.95
- 8-5 gallon buckets (I was fortunate to have some from here on the farm that I could recycle). I am doing 2 tomatoes, 1 cabbage, 1 bucket with 4 pickling cucumbers, 2-broccoli, and 2-straightneck squash. I am thinking of adding several buckets of strawberries. ($4.50 Hertzler Farm and Feed). I can easily add more buckets as I “grow” into my system.
- 5 gallon paint strainer nets (Goodwyn’s Hardware): 2 pkg $3.99
- 4 cu. ft bag of Coarse Perlite (Hertzler Farm & Feed): $18.99
- 2″ PVC tubing 10′ ($7.95) and 2″ PVC end cap ($1.29) and 2″ elbow ($2.39):(Goodwyn’s Hardware)
- 1/2″ PVC tubing ($2.49 for 10′ section), 1/2″ PVC elbows ($.49 ea): (Goodwyn’s Hardware). The pipe is actually 7/8″ outside diameter and 1/2″ inside. This works with the grommets.
- I used 5/8″ Antelco irrigation mainline tubing A51082 ( $12.00 50′ roll), Antelco 1/4″ spaghetti dripline tubing A50812 ($4.99 50′ roll), Antelco 1/4″ tubing barb connectors A40195($.59 each) and Antelco Pocket Punch tool A50048 ($14.95): Hertzler Farm & Feed.
- 4′ Fluorescent Light Fixture with pull chain ($29.99) and 4′ grow light bulbs. (I needed this as the section of my greenhouse that I am setting this up in does not have the best lighting). (Hertzler Farm & Feed)
- 8-rubber grommets. Inside hole is 3/4″ with outer ring 1-1/8″ (Graingers). This was my hardest and most confusing item to come up with. After checking numerous places, I ordered from Graingers. They were $8.71 but with tax and shipping it was $18.94 for a package of 50. Item #3MPL8.

Windows Live Hotmail Team Said:
on April 1, 2014 at 9:35 am
VERY interesting! Thanks for sharing. 🙂
Date: Tue, 1 Apr 2014 02:36:31 +0000 To: dlsburk@hotmail.com
hidroponik Said:
on November 22, 2015 at 11:10 pm
Usually I don’t read article on blogs, but I would like to
say that this write-up very pressured me to
try and do so! Your writing taste has been surprised me.
Thank you, very great article.
http://www.obat-asamurat.com/cara-mengobati-asam-urat/ Said:
on November 23, 2015 at 12:56 pm
Everything is very open with a really clear clarification of the issues.
It was truly informative. Your website is extremely helpful.
Thanks for sharing!
Brenda Campbell Said:
on February 6, 2016 at 1:08 pm
Really enjoyed this Information/ read. I want to try this. What is the temperature range needed?
Pat Said:
on February 7, 2016 at 3:26 pm
I am not sure. I really have a lot to learn. I only did it one time and that was as I posted the blogs. It started out with a flourish and then everything fizzled out. I think I know at least one mistake. I didn’t have the correct fertilizer ratio. I need to go back and relook at the videos I got my inspiration from. It should work and I do want to try it again. Temperature may have been an issue but lettuce likes cool weather so I am not sure. It is a learning curve and I do want to try again and not let my first year failure stop me.